LAST UPDATED: 6/4/21
Brands
Located in the My Account section, your Brands tab controls the company name, logo, and contact information that appears on your correspondence with clients and prospects. Every client and prospect is associated with a brand. In most cases, this is your default brand. This brand controls the logo and contact information clients see on marketing and status emails, printed letters and flyers, custom-branded website pages available to Marketing package subscribers, and any other consumer materials you create within Insureio.
There are three steps required to set up your account: filling out your personal information, configuring your email, and setting up your brand.
In this article, we'll cover how to set up your brand.
- Step 1: Filling out your personal information.
- Step 2: Setting up your brand.
- Step 3: Configuring your email.
It's extremely important to set up your brand correctly.
Information you include here will auto-populate status and marketing emails that go out to clients. If you do not fill out your brand completely and correctly, your clients may receive emails that contain blanks instead of important information like your name and contact information.
Note: Fields in red must be filled in for status and marketing emails to populate correctly.
Jump to a section:
- Viewing Your Brand
- Completing Your Brand
- Uploading and Sizing Your Logo
- Uploading and Sizing Your Marketing Header
- Adding Your Brand Colors
- Using Multiple Brands
- Allow Lead Distribution & Add Brand Members
- Enable a Multiple Agent Commission Split at the Brand Level
Viewing Your Brand
1. From your left-hand main menu, click My Account / Brands. Scroll down to the Brands tab.

2. Double-check your default brand. The first time you log in, you'll see your name listed as your default brand. Every Insureio user begins with the account holder's name brand profile as their default. Beneath your default brand selection, you'll see a list of your available brands. If you create additional brands, you can then set a new brand as your default using the Make Default button. The phone number listed with your brand will auto-populate based on the phone number you entered when you created your account. You can always change it by modifying the brand details, as explained below.

3. Click the dropdown arrow to the right of the brand you want to edit. Choose Modify.

4. There are several information blocks you can view and modify. We'll go over each of them in detail below. They include contact info (name, phone, company, email, website/social, address), logo and marketing header image, access to the brand, and commission split information.

Completing Your Brand
Contact Info
Brand Name - Required: Fill in your brand name as you want your clients and prospects to see it. Insureio will auto-fill this field with the first and last name of the account holder. Click inside the text box to change the default entry. Marketing and status templates use this as part of an email signature block.
Phone Number - Required: Fill in your brand's phone number as you want your clients and prospects to see it. If you do not fill in a brand phone number, the system will automatically fill in the phone number in your personal profile. Marketing and status templates use this as part of an email signature block.
Company - Required: Fill in your company name as you want your clients and prospects to see it. Your company name will appear beneath your agent name - you should distinguish your company name if both of these are the same. For example, your name might be John Smith and your company name might be John Smith Insurance Agency or Insurance Agent. Marketing and status templates use this as part of an email signature block.
Email - Required: Click Add Email and fill in your email address as you want your clients and prospects to see it. Insureio will save your information automatically. Marketing and status templates use this as part of an email signature block.
Website / Social Account - Required: Click Add A Website Or Social Media Account. From the dropdown menu provided, choose website, LinkedIn, Facebook, or Twitter. If you choose "website," fill in the complete URL of your website, including http:// or https://. If you choose a social media network, enter the custom URL fragment of your desired social media account. Marketing and status templates use this as part of an email signature block.
For a website: http(s)://yourURLhere.com
For LinkedIn: http://www.linkedin.com/in/enter this portion of the URL
For Facebook: https://www.facebook.com/enter this portion of the URL
For Twitter: https://twitter.com/enter this portion of the URL

Address - Required: Fill in your brand's address as you want your clients and prospects to see it. You can mark an address as home, work, or mailing using the dropdown menu provided. Marketing and status templates use this as part of an email signature block.
Save Your Changes
IMPORTANT: To save your changes, be sure to scroll down to the bottom and click Save Brand.
Setting Initial Status Type
This field allows you to set a status type for any new lead that enters the system under this brand. Every lead must have a status type associated with it, which is dictated by the statuses available to that brand. The system-wide default status is "prospect." Even if you do not select "prospect" as a status type here, your new leads for this brand will be set to this status. You can choose any of the global statuses available through the dropdown menu (i.e., "New Lead," "New Lead w/Agent Email Notification," etc.). If you have created a custom status within the Agency Management tab, you'll see that available to you in the dropdown menu as well.

Sample Workflow: An agency manager sets up their brand in this tab and assigns an employee to this brand. That employee would then be able to send marketing emails as this brand.
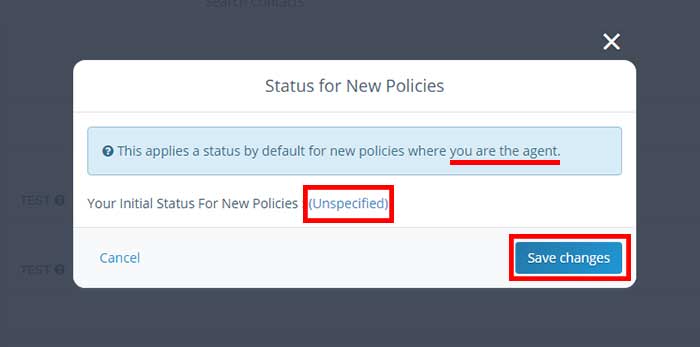
What if you don't want to control initial status based on brand? In this case, you could set the User's Default Status Type, which sets initial status at the user level - i.e., all of an Insureio user's leads enter the system with the user's selection for initial status type, regardless of the brand's initial status type. This is not recommended in most cases. If the user sets a default initial status, it will override a brand's initial status. However, this functionality may be helpful if you have multiple lead distribution recipients with individual branding profiles, but the user wants to standardize the handling of initial lead status using a status such as New Lead with Agent Email or Text. To set your user-based initial status, go to Agency Management / Policy Status Rules, and click the Status for New Policies button. Click (unspecified), select a status from the dropdown, and click the Save Changes button.
Logo
Insureio's consumer-facing eMarketing website, InsuranceDivision, has a placeholder for your logo. You can also add this logo to any email templates you create or clone. The placeholder is a square 200 pixels x 200 pixels. For best results, upload a square image that will fit these dimensions. If your logo isn't square, you can still position it in the center of the logo placeholder. We'll show you how below.
Step 1: Click on the default Insurance Division logo. If you hover your mouse over the default logo, you'll see a prompt asking you to click to choose a different logo.

Step 2: Upload the logo you want your clients and prospects to see in their communications with you.

Step 3: Drag your logo into the placeholder and reposition as needed. Click Save.
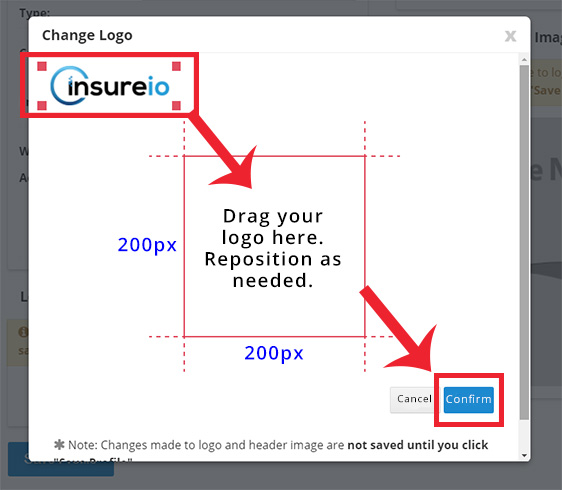
Step 4: Click Confirm at the bottom of the screen after the upload is complete.

FOR ADVANCED USERS: Want to display this logo in an Insureio email template? Create a new template or clone an existing template. Use the curly brace {{ profile.logo_thumb }} for a small 100 pixel x 100 pixel logo, or use {{ profile.logo }} to display the full-sized 200 pixel x 200 pixel version of your logo.
Marketing Header Image
Required: Insureio's status and marketing email templates all have a placeholder for your header image. The placeholder is rectangular, with maximum dimensions of 540 pixels wide by 200 pixels tall. For best results, upload a rectangular image that will fit these dimensions. If you're not sure what your header image should include, start with your logo and contact information, as in our sample below. For a detailed walk-through and tips on using marketing headers, click here.
Marketing templates will automatically pull this header into each template before sending. By default, the header image will display at a smaller size than you uploaded. This is a failsafe for accounts that do not have a header image - should a user skip this step, their brand logo will display instead to keep the end result professional looking. If you want to display your header at full size, two additional steps are required - we'll walk you through it below.Sample marketing header:

Step 1: Click on the placeholder image. If you hover your mouse over this image, you'll see a prompt asking you to click to choose a different header image.

Step 2: Upload the header you want your clients and prospects to see in your brand's marketing emails.

Step 3: Drag your logo into the placeholder and reposition as needed. Click Confirm. Header too big? Use the red resize handles at the edges of your image to resize, then position in the placeholder.

Step 4: Click Save Brand after the upload is complete.

FOR ADVANCED USERS: Want to display the full-size version of your header image in your marketing emails? We've got a detailed walk-through here. In a nutshell, first you'll clone the marketing template you want to use - you may want to append "Full Size Header" to the template name to help you remember. In the template's visual editor, look at the top for the merge tag {{ profile.header_small }}. Delete _small, so you end up with a merge tag that reads {{ profile.header }}. Save your template. When you send emails using this adapted template, the header image will fill the full 540 x 200 pixel area.
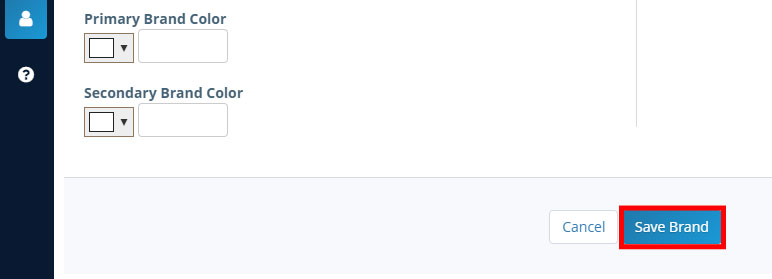
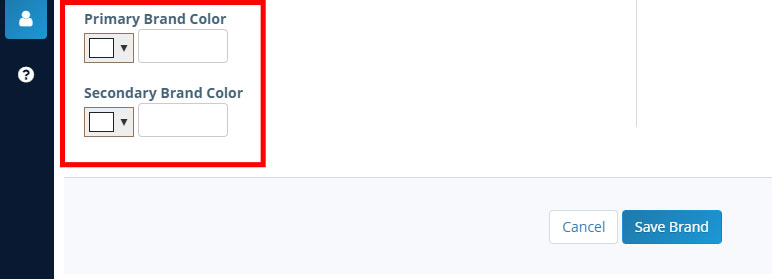
Adding Your Brand Colors
Insureio lets you save a primary and secondary brand color.
Step 1: Choose how to enter your colors: by hex code or using the color picker.
If entering a hex code, type or paste your hex code into the text box.
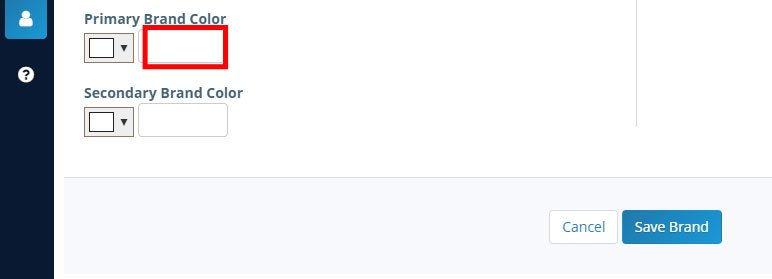
If using the color picker, click the dropdown arrow. Click in the rainbow panel on the right to pull up a field of shades to select from. Click on the black dot and drag it to the desired color. Click “choose” to select that color. The system will automatically fill in the hex color code for the color you selected.

Step 2: Click Save Brand.
Using Multiple Brands
All Insureio subscribers can create and use multiple brands. Using more than one brand is helpful if you have multiple lead-gen websites, association or affiliate partners, or multiple operating names/companies. It can also simplify tracking and reporting if you submit business under different hierarchy, sales, or business relationships.
Setting Up Multiple Brands: In the My Account / Brands tab, click the blue New Branding Profile button. Enter your new brand's details as described above. Click the Save Profile button. To exit without saving, click outside the data entry window.

Changing Your Default Brand: Once you've set up one or more profiles, you can choose which one should be the default brand. Here's how:
Step 1: In the My Account / Brands section, find the Default brand text box.
Step 2: Click inside the text box. Start typing the name of the brand you want to make your default. Insureio will show you all available options that match what you've typed. Click to select the brand you want. You'll see that brand in the text box now.
Step 3: Click the blue Make Default button to save your selection as the default brand.

Allow Lead Distribution & Add Brand Members
Step 1: Check the box to make this brand available for lead distribution and accessible to other users (required for a commission split).

Once you check the box, you’ll see an entry field that lets you give another user access to your brand.
- If you want a system user to receive leads from this brand, they must be entered here.
- If you want to split the commission with another system user, they must be entered here.
- First priority: Lead type and source match
- Second priority: Lead type, but no source
- Third priority: Source, but no lead type
- Fourth priority: No source or lead type
Step 2: Start typing the name of a system user and Insureio will pull up any matches. Select the correct user and click the blue checkmark to save your entry. Once you click the checkbox, another blank field will appear for your next entry.

Step 3: Click Save Brand at the bottom of the column.
Enable a Multiple Agent Commission Split at the Brand Level
If you know that all policies placed under this brand will have a commission split, you can enable that split here at the brand level. Each entry you add here will create another agent of record to whom you can assign a percentage of the commission. You can also add criteria for lead type and source to ensure that the correct split is applied based on where that policy originated. If needed, you can override these brand-specific rules within a policy.
When a lead hits the system for this brand, the system will first look for rules that apply to that lead’s source and/or lead type. If the system finds a match in the rules you enter here, the percentage set in those rules will apply. If the system finds no commission split details with matching lead type and/or source, the split will be applied according to the remaining rules. Here’s the order in which the system looks for and applies your rules:
Add Commission Split Rules
Step 1: Click Add Split.

Step 2 (optional): Click to select a lead type and/or source. These values are pre-populated based on previous use within that brand. If you don't use lead distribution, you may see no available fields or a default such as "IO quote path submission."

Step 3: Add assigned user. Start typing the name of a system user. Insureio will pull up possible matches. Click to select the desired user. NOTE: Only users who have been given access to the brand will be available to select. Don’t see the user you want? Make sure they are members of the brand (as shown in the image below - the entry box is directly above the commission split entry).

Step 4: Add the percentage this user should receive.

Step 5: Click the blue checkmark to save this rule.
Once you add an additional agent of record, the system will add a row for the agent assigned. It will assign the remaining percentage to this agent. You can add additional agents of record by repeating the steps above. You may have up to six agents of record and one agent assigned.

Ready for the next step?
Your personal information and your brand are all set up!
Now it's time to configure your email account so the system can send status and marketing emails on your behalf.