LAST UPDATED: 1/4/23
Quoting Widget
In the Marketing section, use the Quoting Widget tab to create a personalized quoter that you can embed on your website(s).
Jump to a section:
Creating a New Widget
Viewing and Testing an Existing Widget
Editing an Existing Widget
Deleting an Existing Widget
NOTE: Wondering how many widgets to create? You may not need as many as you think! Every widget sets a "quoter_url" field on the consumer record generated. This means you can use the same widget on different pages and still track which page a particular consumer came from. That URL will be visible in the consume record, in the Consumer Details section on the right: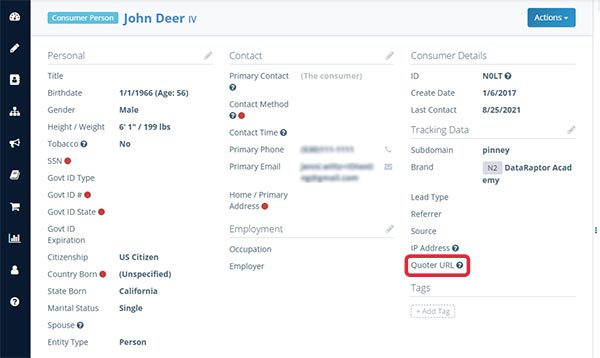
Already have a widget installed but want to know: (a) how to set up advanced tracking using marketing tags and quote data, or (b) how to pre-populate certain fields in your quoter? Click here.
Creating a New Widget
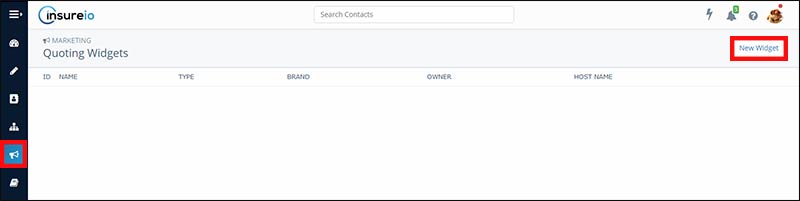
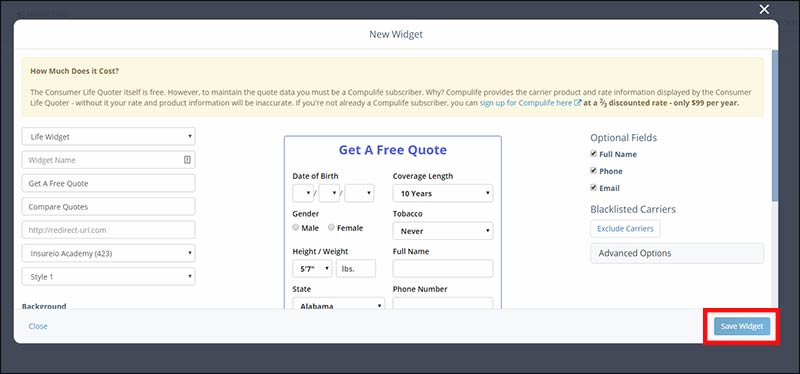
- In the Marketing/Quoting Widget tab, click the New Widget button at the top right of your screen.
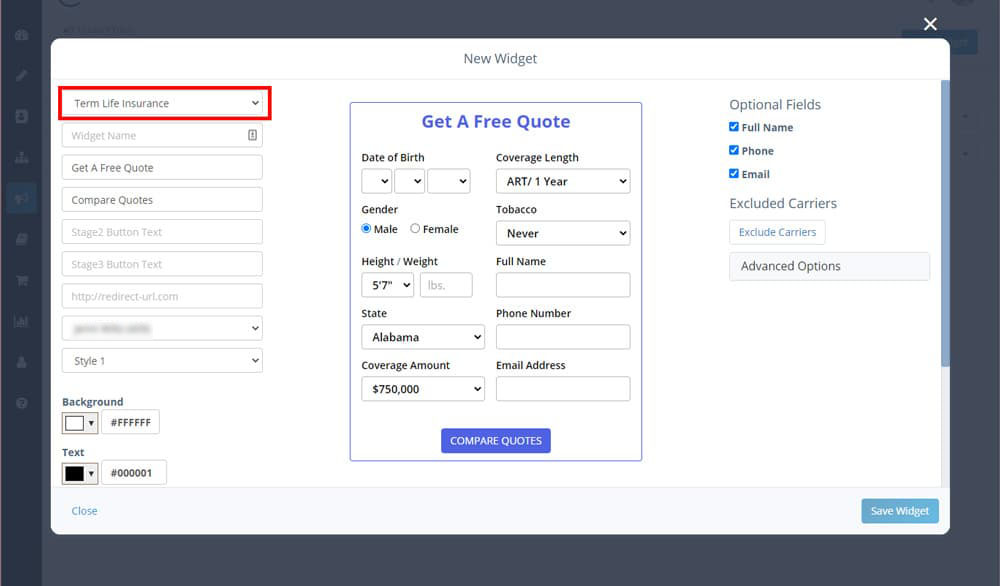
- Fill out the form to customize your widget. Here are the available options:
- Type. Use the dropdown menu to choose term life insurance, LTC, or a lead capture widget that will collect a prospect’s name and email address so you can follow up manually.
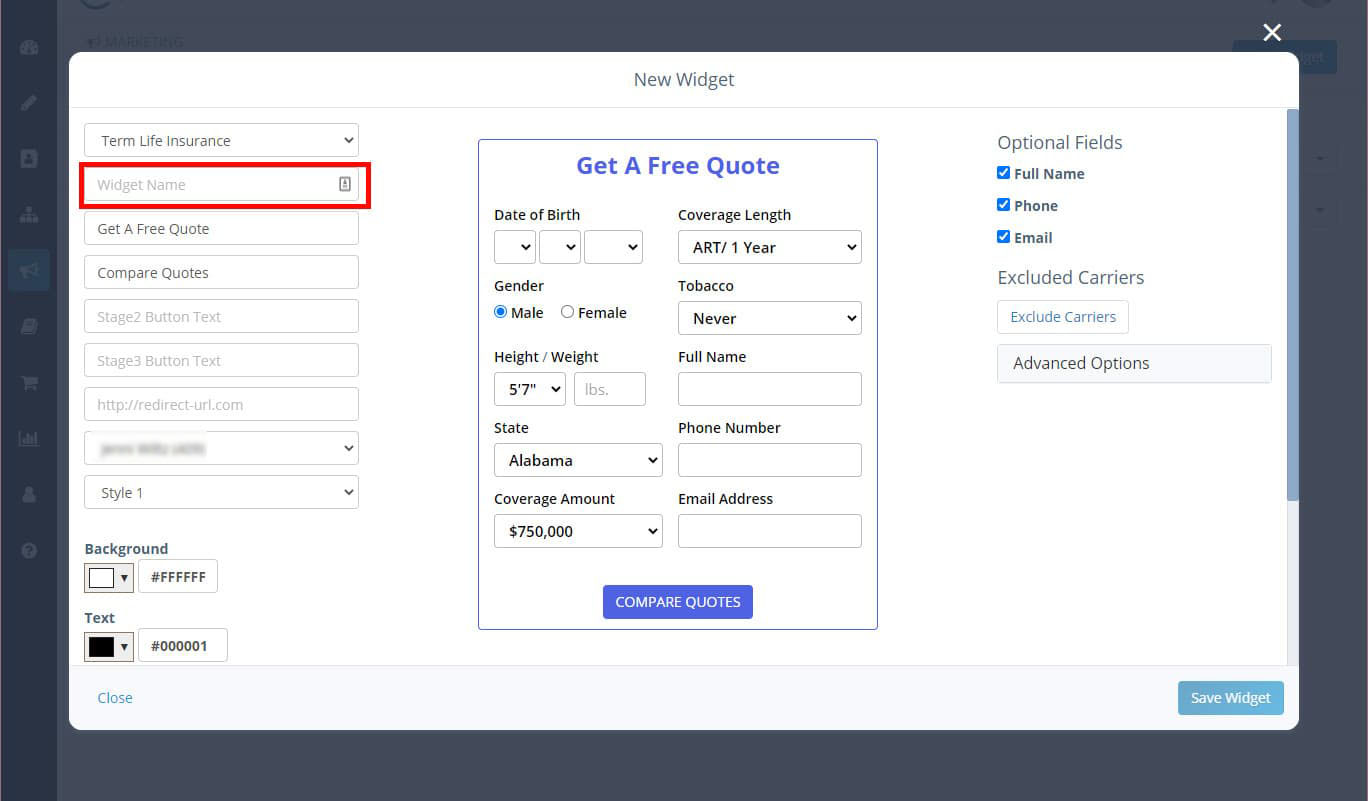
- Widget Name. Enter the name for this widget in the text box below the widget type. Your saved widgets will be listed by their names. If you plan on A/B testing small design changes like button color or text, be sure you name each widget appropriately so they’re easy to locate in your list of widgets (i.e., “Life Widget with Green Button,” “Life Widget with Orange Button,” etc.).
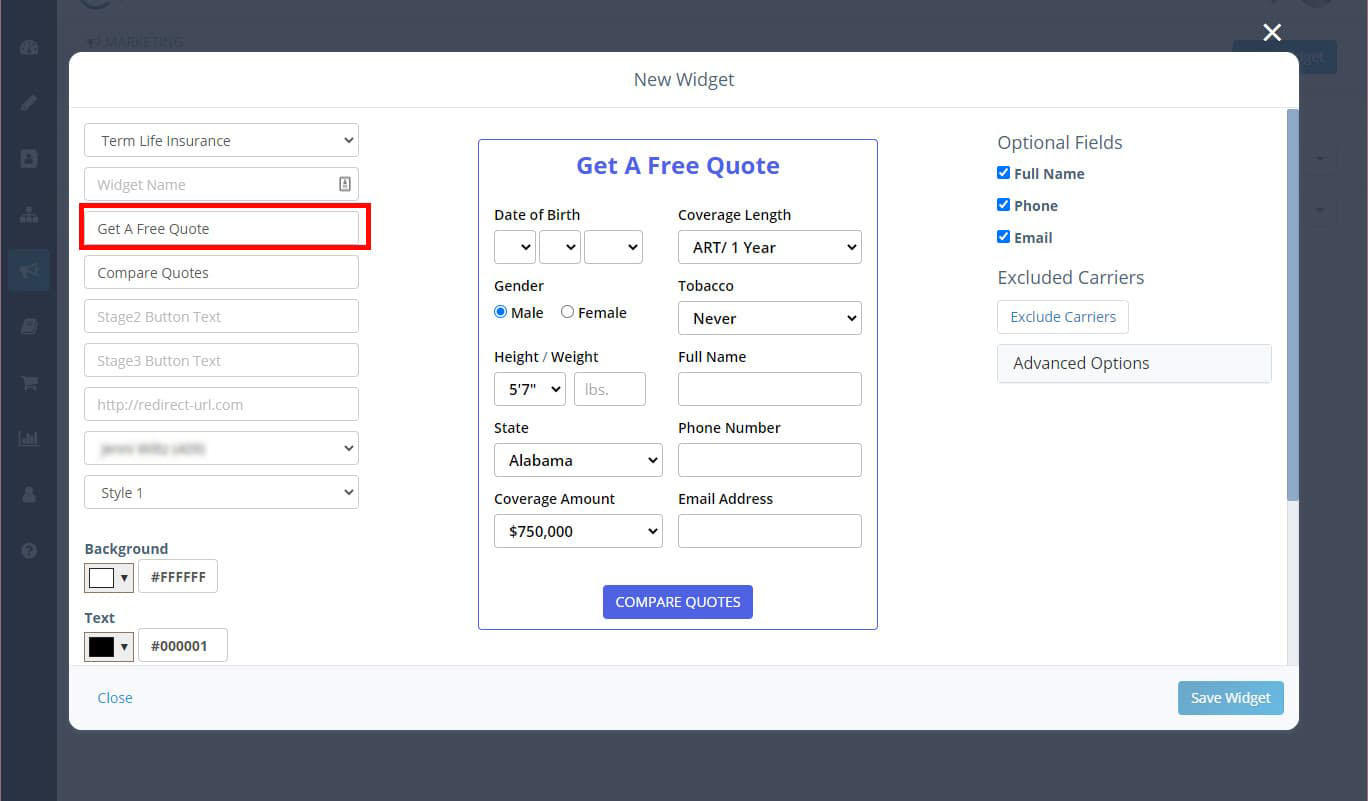
- Widget Headline. Enter the headline for this widget in the text box below the widget name. The default text is “Get A Free Quote.”
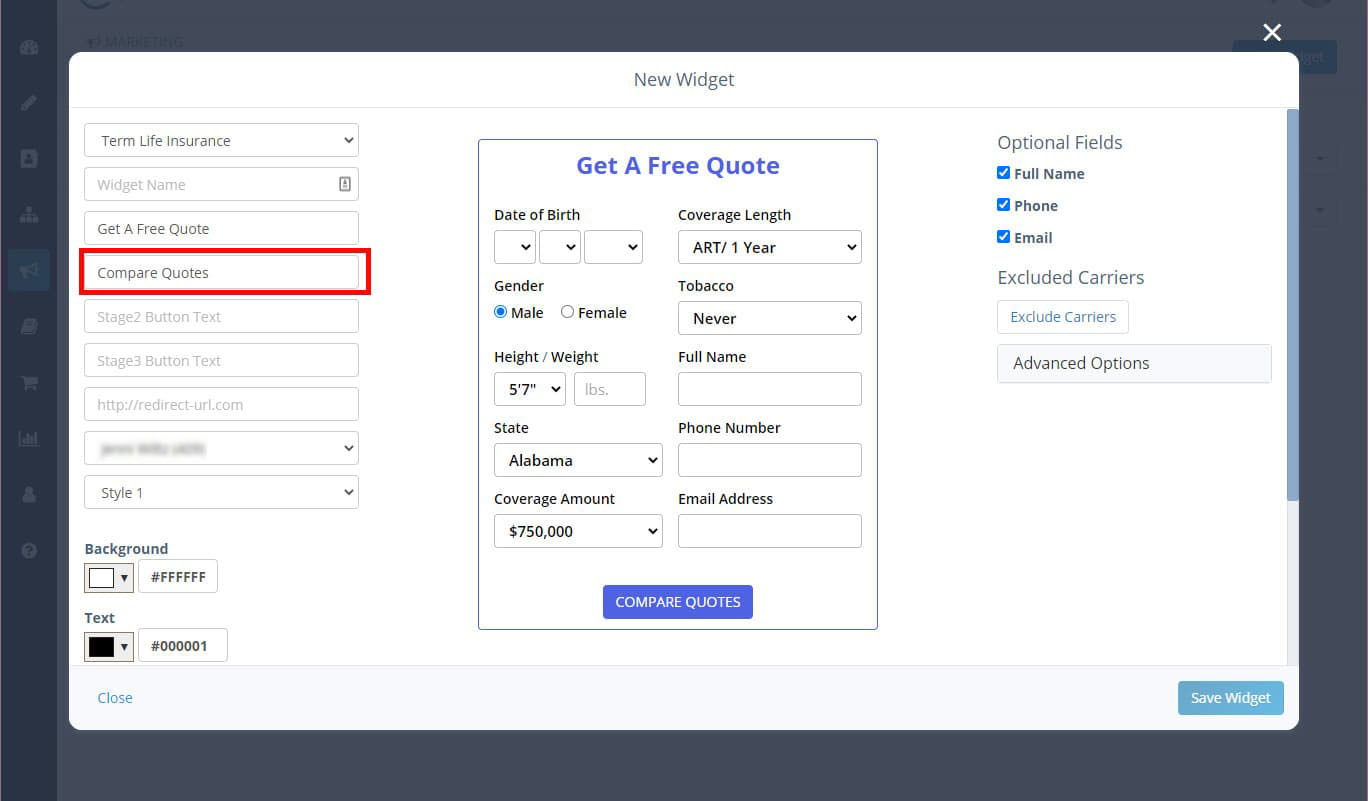
- Widget Button Text. Enter the desired text for the widget's clickable button into the text box below the widget headline. The default text for the clickable button is “Compare Quotes.”
- Stage2 Button Text. Once your prospect has clicked the button to compare quotes, they'll see a button beside each quote result, like this:
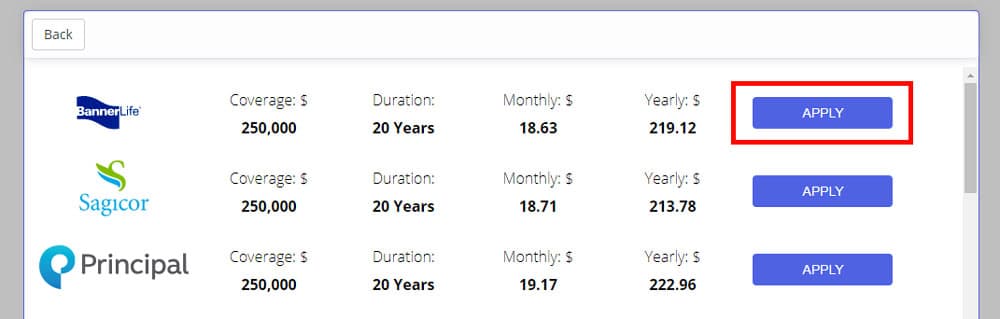
Fill in what you want that button to say in the Stage2 Button Text box (i.e., Apply or Learn More).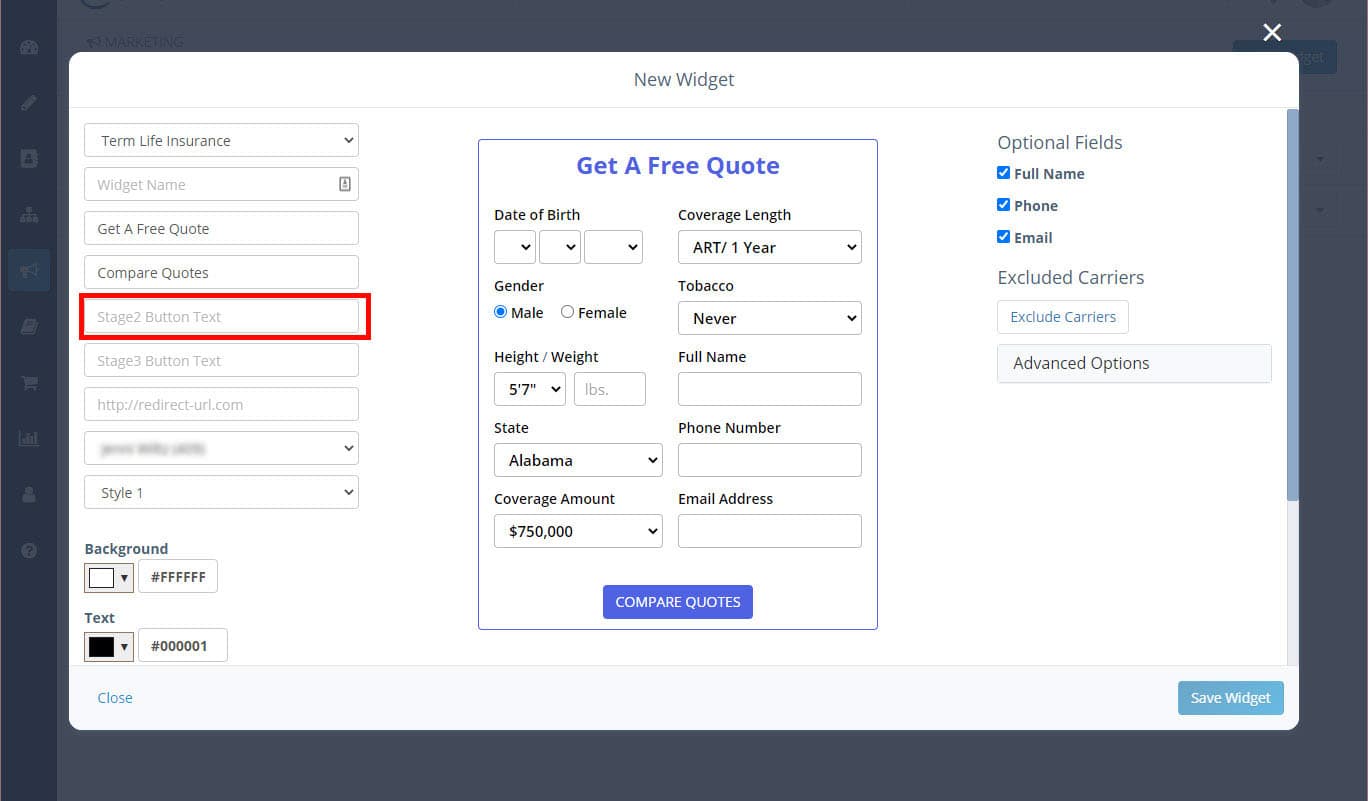
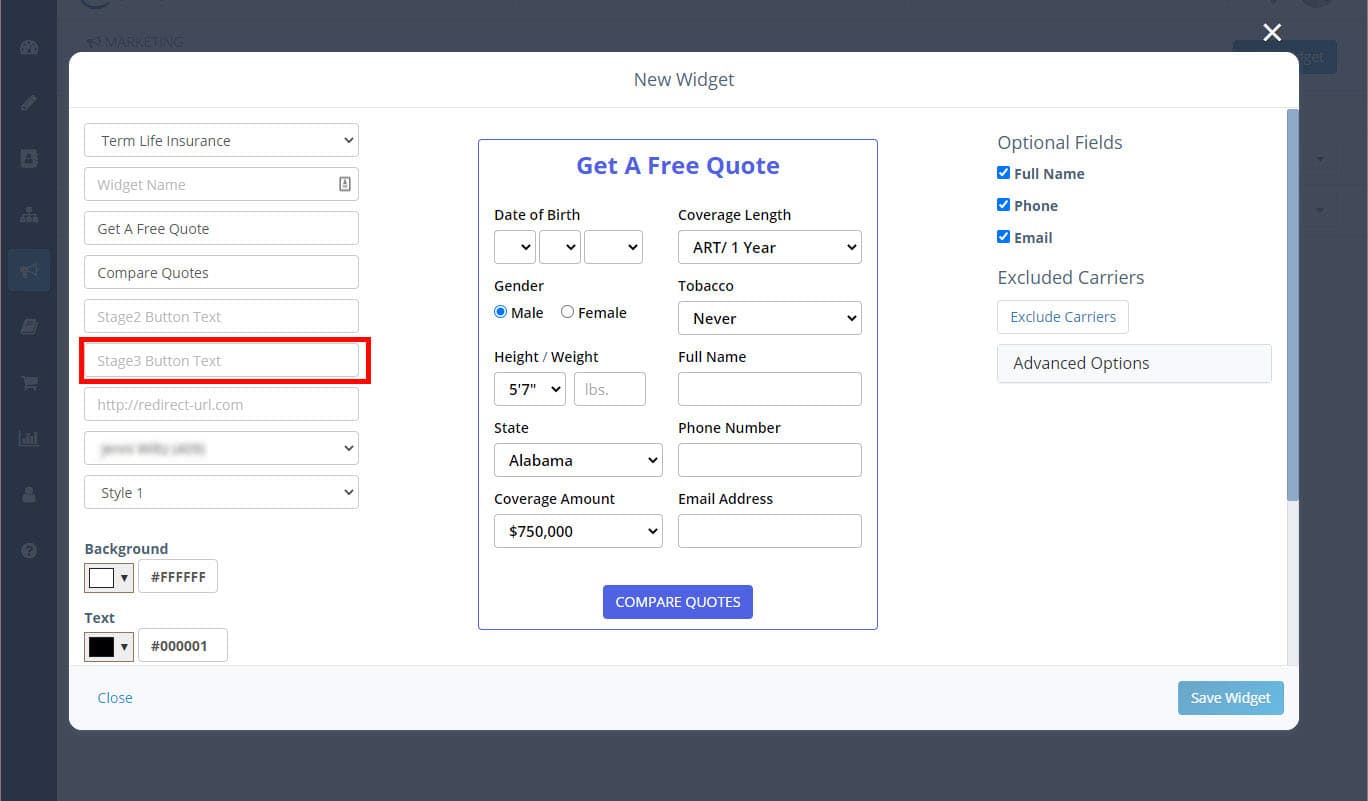
- Stage3 Button Text. If by de-selecting information from the Optional Fields (see below), you skipped collecting the full name OR the email and phone before presenting your client with quotes, they will be prompted to provide that information once they have selected a quote. Fill in the text you want that button to display (i.e., Apply or Request More Info).
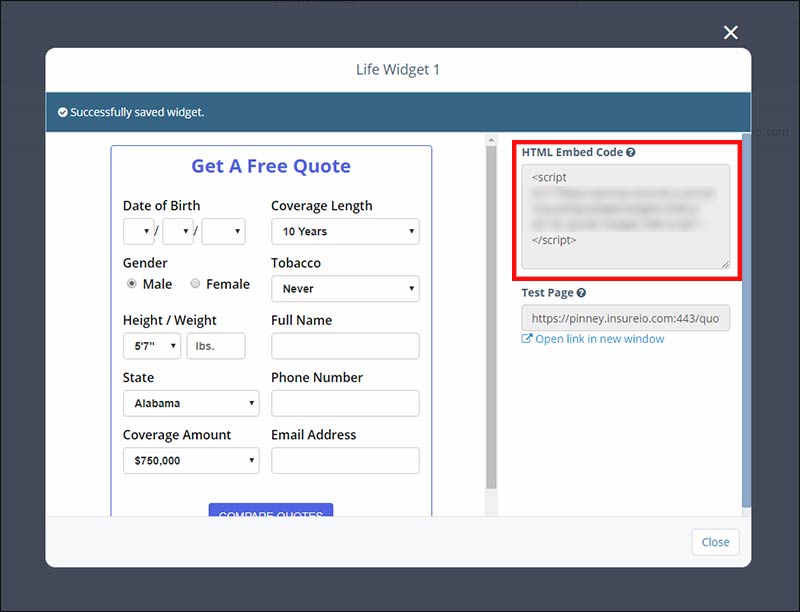
- Widget Redirect URL. Once your prospect has selected a quote and provided the information you require (see "Optional Fields" below), they'll see a success message like in the image below. When they click OK, they'll be redirected to the URL you enter in this field.
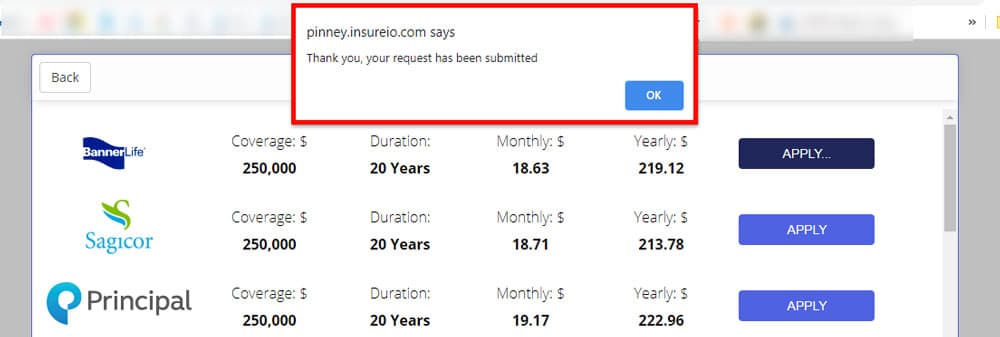
If you have a specific thank-you page on your website (or a page you want your prospect to see after they request a quote and have provided all the relevant information, enter it here. If you don't have a specific page you want to send them to, use your website's home page. This is the URL they will be sent to after they have completed each stage of the quoter (initial information, quote selection, contact information). Be sure to include the "http://". If you forget it, you'll see a tan message box above the URL entry field reminding you to include it. Until your URL is complete, the "Submit" button will not save your selections.
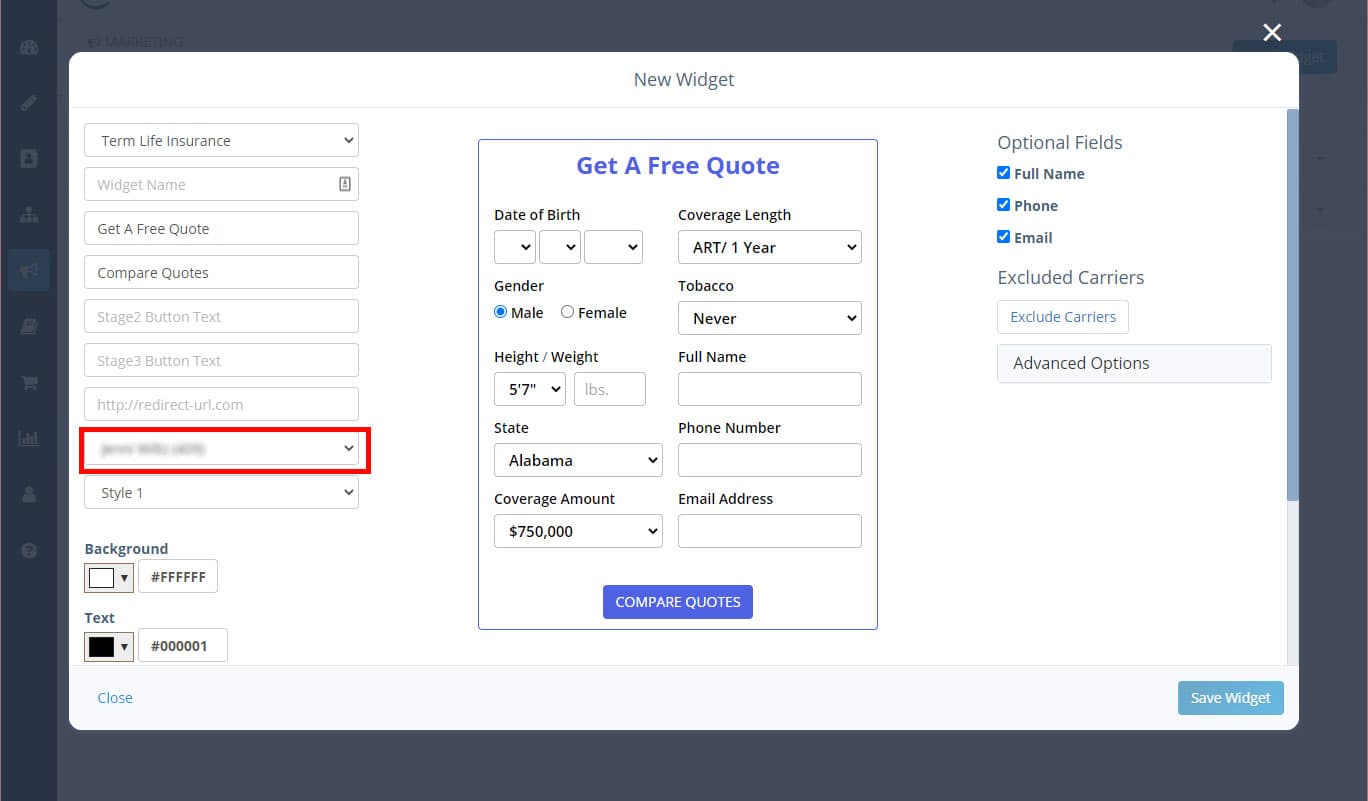
- Widget Branding. By default, the brand for this widget (and all its resulting leads) is your default brand. If you want to change this, use the dropdown menu to select the appropriate brand for this widget.
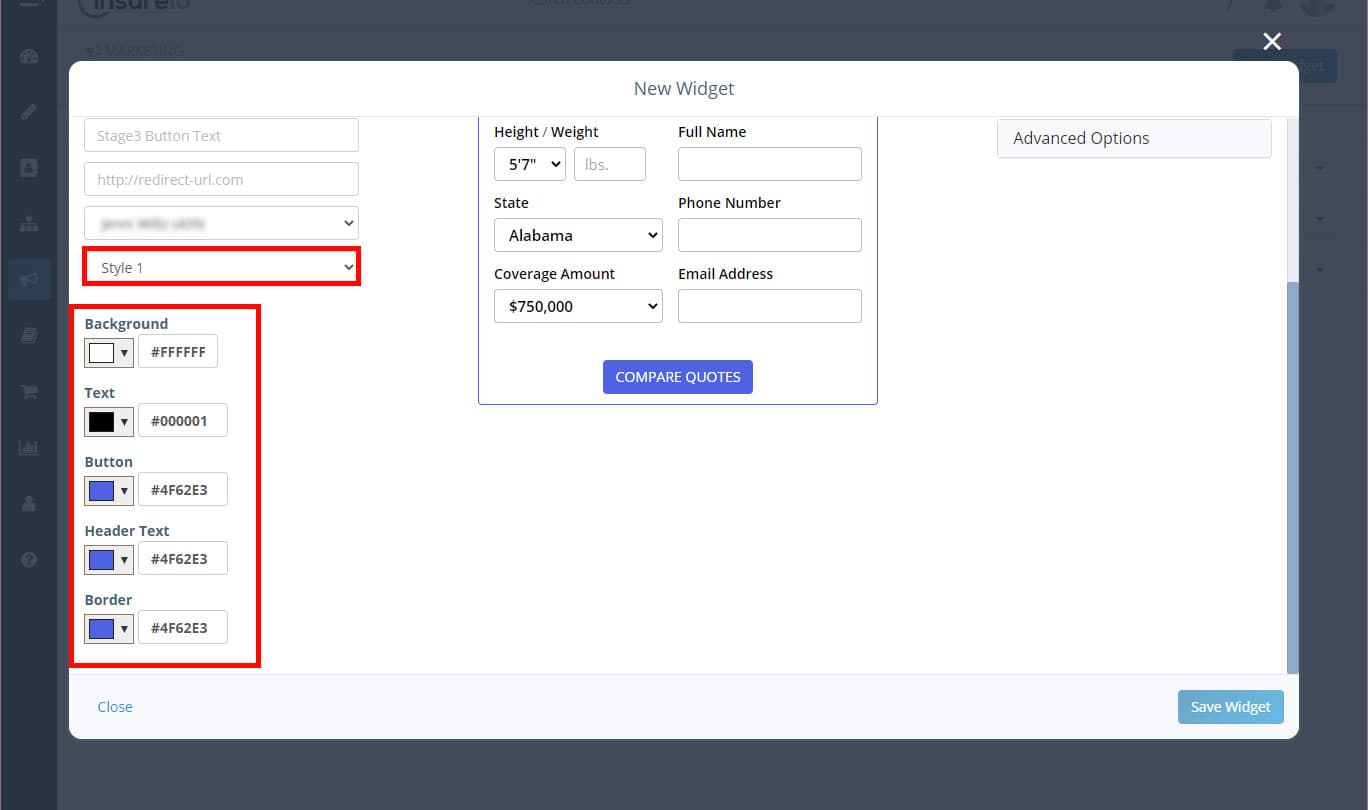
- Widget Styling. Use the dropdown menu to choose between styles. You’ll see an instant preview on your screen. To change the colors of the widget background, text, button, header text, and border, use the dropdown menus. Each dropdown menu contains a color picker. If you know the hex codes for your brand's colors, you can input them in the text box instead of using the color picker.
- Optional Fields. Available for term life and LTC widgets. All three fields are selected by default. If you leave this selected, the consumer record will be created as soon as the consumer clicks the button to select a quote, saving that quote as well as their provided contact info.
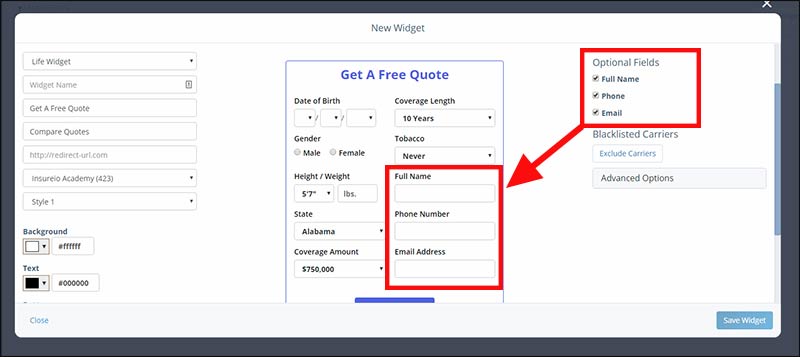
But if you want, you can require less information from prospects up-front by de-selecting Full Name, Phone, and/or Email. When you do this, you will need to fill out the Stage3 Button Text field described above. Once the consumer selects a quote, they'll be prompted to supply the missing information, and that screen's button will contain your Stage3 Button Text.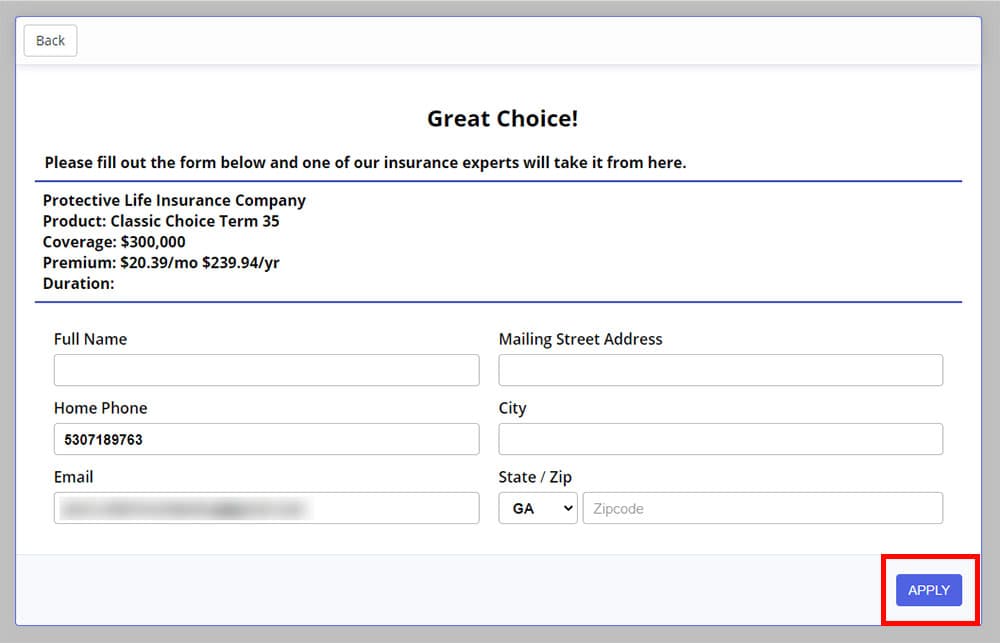
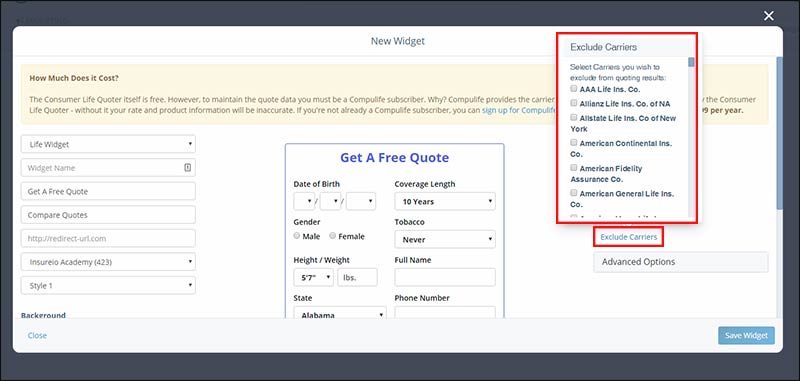
- Blacklisted Carriers. Available for term life and LTC widgets. If you want to exclude one or more carriers from your quoter’s search results, use this option to do so.
- Advanced Options. Click this field to assign lead type, source, referrer, tags, and agent split codes to any leads that are generated through this quoter. You can use multiple words if you want - spaces and capital letters will be preserved when the lead type, source, referrer, and tag(s) hit the system.
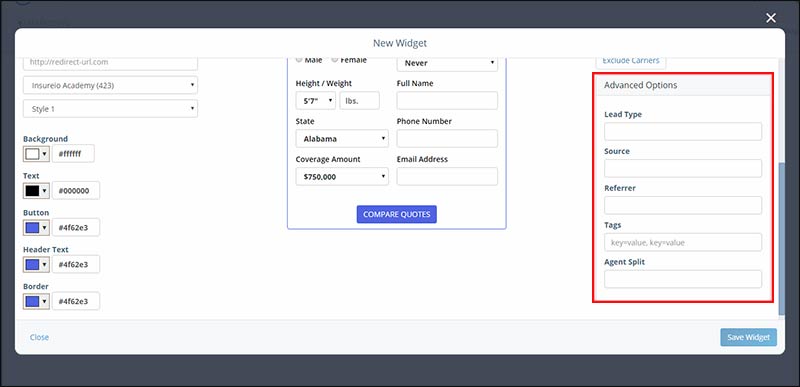
- TIP: Use a prefix to help clarify and identify your tags as in the example shown below:
- Marketing=Life Insurance Prospect
- Health=Diabetes
- Avocation=Pilot
- Lifestyle=Suspended License
- Financial=High Net Worth
- NOTE: Additional Advanced Options - Track Leads using the Page URL. This quoting widget can also add items like marketing tags and quote data using the page URL. This is handy if you're receiving traffic referrals from a different site(s) and want to report tracking data back to the referring site's owner. Using a promo code or similar tracking method would allow for the widget to append leads with this additional data. Here's an example: http://www.yourwebsite.com/life_insurance_quoter?io_tags[]=pagefocus-diabetes&io_tags[]=quoterlocation-footer. Everything after the ? would be added to any leads generated during that session of the quoter, telling you the page focus was diabetes and the prospect clicked the quoter in the page footer. Adding subsequent tracking elements is as easy as adding &io_tags[]=next-parameter. Click here for a full explanation on appending advanced tracking parameters.
- TIP: Use a prefix to help clarify and identify your tags as in the example shown below:
- Type. Use the dropdown menu to choose term life insurance, LTC, or a lead capture widget that will collect a prospect’s name and email address so you can follow up manually.
- When you’ve made all your selections, click Save Widget to save your widget.
You’ll see a preview of what your widget looks like, along with the source code to paste into your website. You can even test the widget in this preview window by entering test data. Or use the test page URL provided to see your widget in action. When you paste the script into your site, be sure to place it in the < body > of a web page, not the < head > - this allows you to control the widget's placement on the page.
- Save Widget button not working? Take a look at your URL entry field. If you're missing the "http://" or a dot extension (.com, .net, etc.), the widget builder won't save your work. Double-check this field and try the Save Widget button again.
Viewing & Testing an Existing Widget
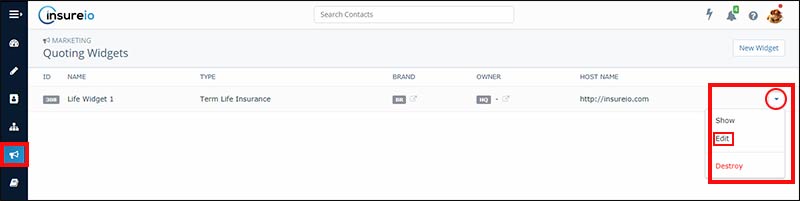
- Click the dropdown menu icon to the right of a saved widget name. Choose Show.
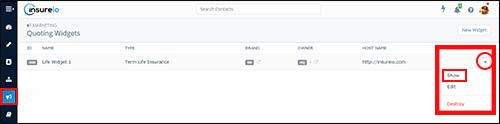
- Your widget design is on the left. You can embed your widget using the HTML Embed Code provided. You can also preview a live version using the Test Page link. If you use WordPress or another plug-in-based website, you may need to adjust your site and/or plugin settings for your widget to work. Many plugins have aggressive security settings that will keep the javascript or html from displaying properly.
- Leads that hit the system through that widget will be visible on your dashboard, with the status you set as your default status for new leads.
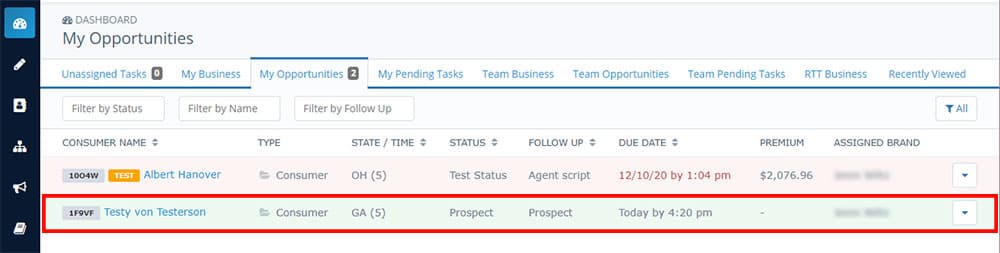
In the consumer profile, you'll be able to see the quoter URL that lead originated from.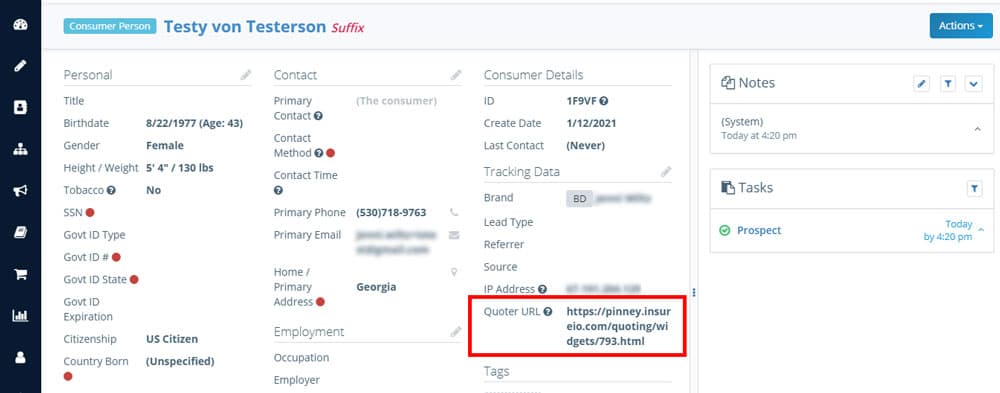
In the Policies tab, you'll see that quote entered as an opportunity.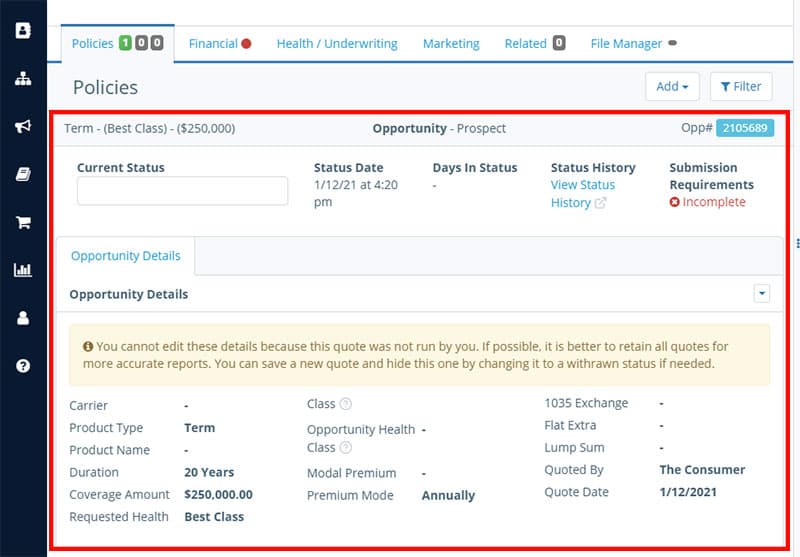
Editing an Existing Widget
- Click the dropdown menu icon to the right of a saved widget name. Choose Edit.
- Make any desired changes.
- Click Save Widget to save your changes, or click outside the editing modal window to cancel.
- Click the dropdown menu icon to the right of a saved widget name. Choose Show.
- Copy the HTML embed code and paste it into your website or landing page. When you paste the script into your site, be sure to place it in the < body > of a web page, not the < head > - this allows you to control the widget's placement on the page.
- Click Close to exit (or just click outside the pop-up modal).
Deleting an Existing Widget
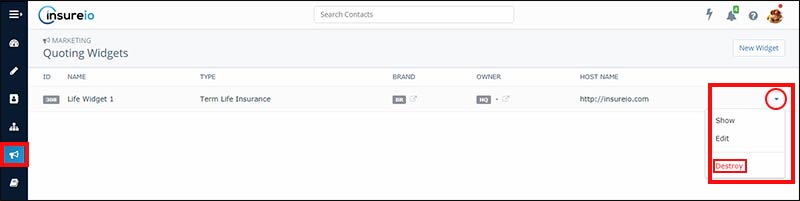
- Be sure you really want to delete this widget - there is no "undo" and no confirmation dialog box. As soon as you click Destroy, that widget is gone for good.
- Click the dropdown menu icon to the right of a saved widget name. Choose Destroy.
You may also be interested in:
Advanced Lead Tracking & Pre-Populating Fields using the Quoting Widget