3CX is one of many web/VoIP-based phone systems - and it's what we use in our office. If you already have the 3CX system, here's how to install support for it in Insureio - and a few common troubleshooting tips to help you get up and running.
Installation
To install 3CX support on your computer, follow the instructions below.
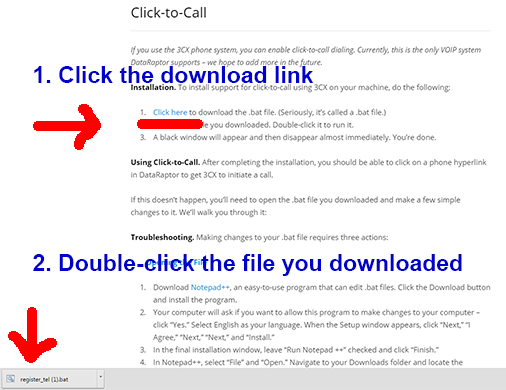
- Click here to download the .bat file. (Seriously, it's called a .bat file - that's pretty cool.)
- Double-click the file you just downloaded. This will run the program.
- A black window will appear and then disappear almost immediately, as the file installs. You're done!
Using Click-to-Call
After completing the installation, you should be able to click on a phone hyperlink in Insureio to get 3CX to initiate a call. That's it!
If this doesn't happen, you'll need to open the .bat file you downloaded and make a few simple changes to it. We'll walk you through it below.
Troubleshooting
Making changes to your .bat file requires three actions:
A. Opening the File
- Download Notepad++, an easy-to-use program that can edit .bat files. Click the Download button and install the program.
- Your computer will ask if you want to allow this program to make changes to your computer – click “Yes.” Select English as your language. When the Setup window appears, click "Next," "I Agree," "Next," "Next," and "Install."
- In the final installation window, leave “Run Notepad ++” checked and click “Finish."
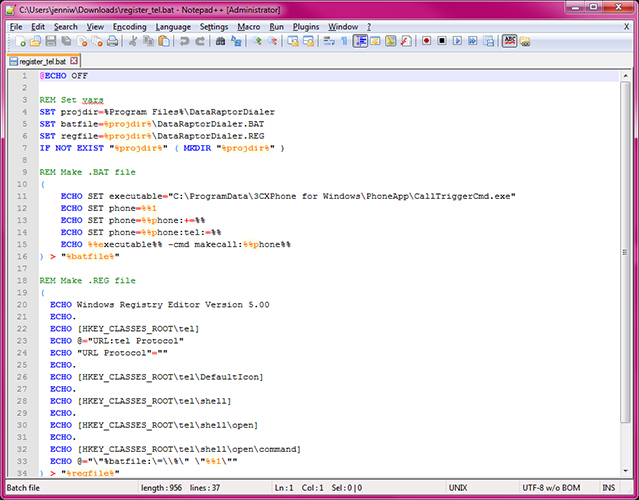
- In Notepad++, select "File" and "Open." Navigate to your Downloads folder and locate the "register_tel.bat" file. Select the file and click “Open.” Here's what this will look like:
B. Editing the File
- Find line 4 of the code. It should look like this:
SET projdir=%HOMEDRIVE%%HOMEPATH%\InsureioDialer
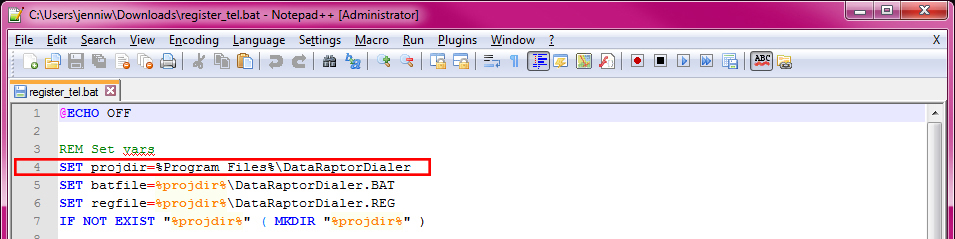
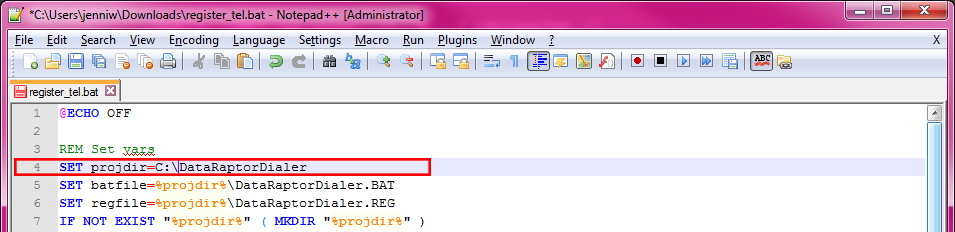
- Click anywhere in that line to bring up a cursor. Change that line to the following:
SET projdir=C:\InsureioDialer
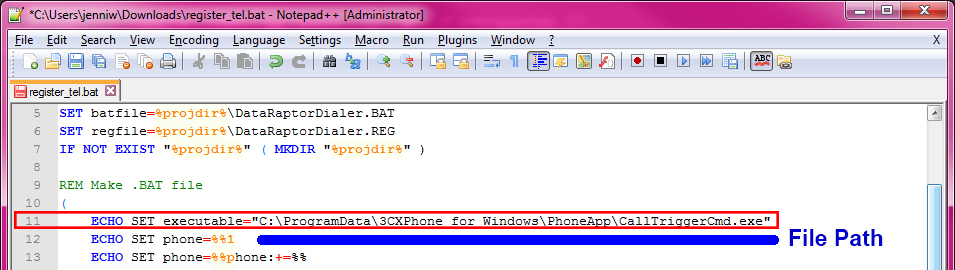
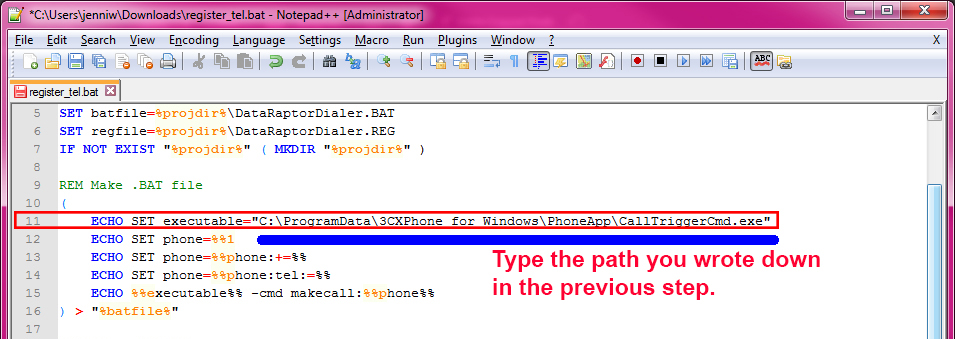
- Find line 11 of the code. It should begin like this:
ECHO SET executable=
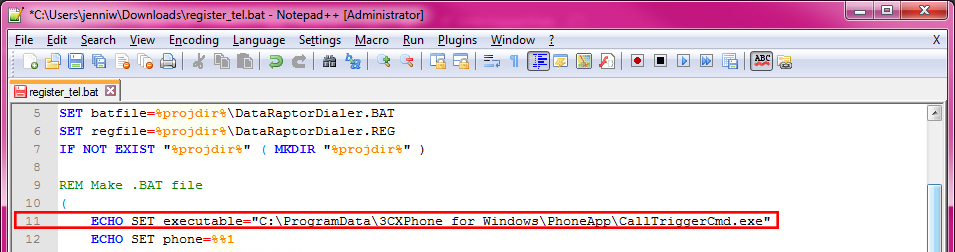
- Look at the file path that appears in the second half of that line. We're going to follow this path on your computer in the next step. The path should look like this:
"C:\ProgramData\3CXPhone for Windows\PhoneApp\CallTriggerCmd.exe"
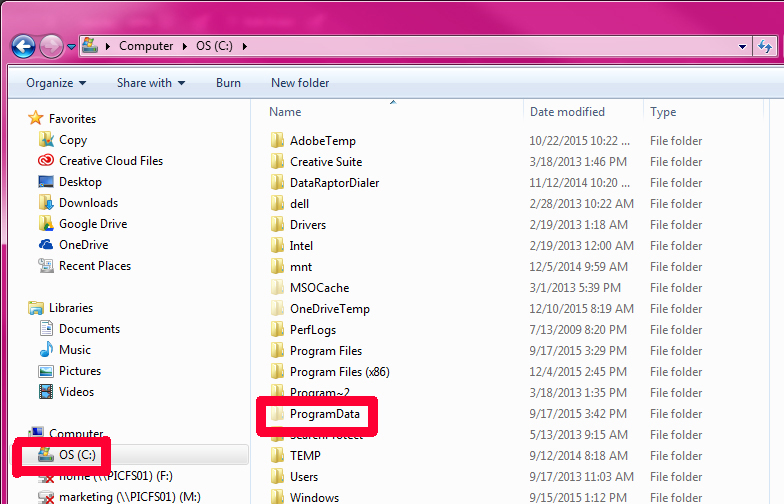
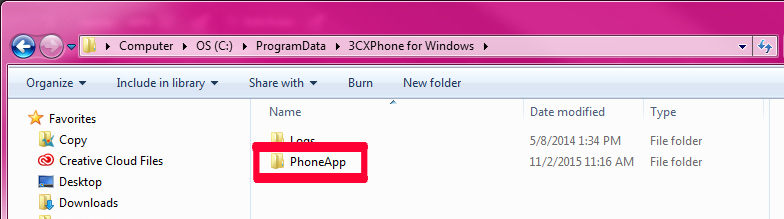
- Open Windows Explorer. Find “Computer.” Click on “OS (C:)”.

- Click ProgramData.
- If the ProgramData folder is not visible, you'll have to tell your computer to display its hidden files. Click the Microsoft Start button.
- Click "Control Panel," "Appearance and Personalization," then "Folder Options." (Newer computers may let you go directly to Folder Options from the Control Panel.)
- Click the "View" tab.
- Under "Advanced Settings," click "Show hidden files and folders." Click "Apply" and "OK."
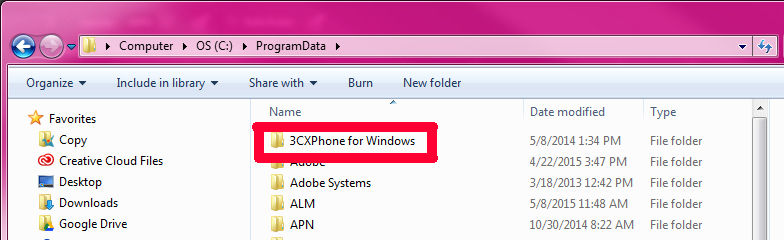
- Click 3CXPhone for Windows.
- Click PhoneApp.
- Look for the file named “CallTriggerCmd.exe.” Found it? Great! Your file is where it's supposed to be - that part of 3CX is working correctly.
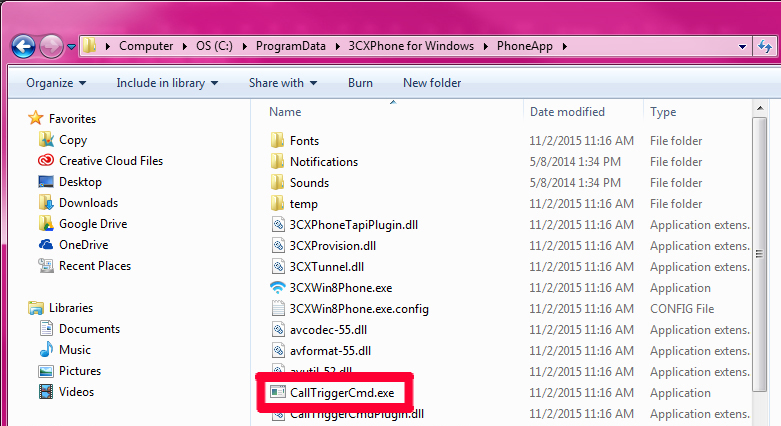
- If you didn't find your "CallTriggerCmd.exe" file, you'll need to find the actual path of this file on your computer. Open Windows Explorer.
- Find “Computer.” Click on “OS (C:)”. Type "CallTriggerCmd.exe" into the search field.

- In your Windows Explorer search results, look at the path (location on your computer) shown beneath the CallTriggerCmd.exe file. The second half of the code on line 11 of your .bat file needs to be the same as the path you see here:
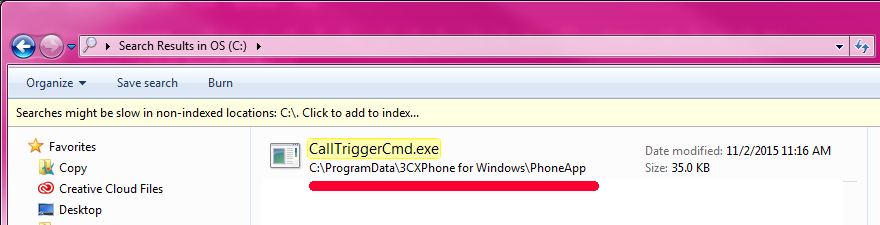
- Write down the path you see and go back to Notepad++.
- Type your path into the second half of line 11.
- Go back to Notepad++ and your register_tel.bat file. Click "File" and "Save."
- Go back to your Downloads folder.
- Find your register_tel.bat file.
- Double-click it. Click “Yes” when your computer asks if it can make this change.
C. Testing Your Changes
- Go back to Insureio and test your changes by clicking a phone hyperlink.
- Got a pop-up from Google Chrome asking you to confirm if you want to use an external application to handle this call? Check “Remember my choice for all links of this type” and then select “Launch Application.”
- Your 3CX phone should ring - it is placing your call. You're done!
- If your phone hyperlink still doesn't work in Insureio, your "tel" extension might be blocked in your browser.
- Close all Chrome browser windows.
- Open Windows Explorer. Click "OS(C:)," "Users," and select the folder with your personal ID (your first name followed by the first letter of your last name).
- Click "AppData," "Local," "Google," "Chrome," then "User Data".
- Find the section named excluded_schemes.
- Within this section, if you can find a line named "tel" and its value is true, your browser was blocking you.
- Change "true" to "false."
- Save the "Local State" file.
- Start Chrome.
- Test by clicking a phone hyperlink in Insureio.