LAST UPDATED: 1/6/21
Email Blast Distribution
The email blast distribution option allows you to send any of the templated marketing emails to a pre-selected group of recipients. First, create a report that collects your desired recipients. Next, you'll input that report name into the blast sending function. The video below gives you an overview of the reporting section and how to build a report for email blast distribution.
Important! Keep in mind that all emails sent by Insureio go out via *your* email account (the one you added via the Email Configuration process). All marketing campaigns are subject to the sending limits imposed by your email provider.
Jump to a section:
Step 1: Enable Bulk Sending
Step 2: Create a New Report
Step 3: Choose Your Report Criteria
Step 4: Send Your Email Blast
Step 1: Enable Bulk Sending
- Before sending your first blast, make sure you've enabled blast distribution in your email settings. To check your settings, visit My Account / Email and look for the Bulk Sending feature. If you didn't enable this feature when setting your initial email configuration, it will be unchecked by default.

- Need to enable your bulk sending? Go to My Account / Email Configuration. Click the dropdown button on the far right and select Edit Account.
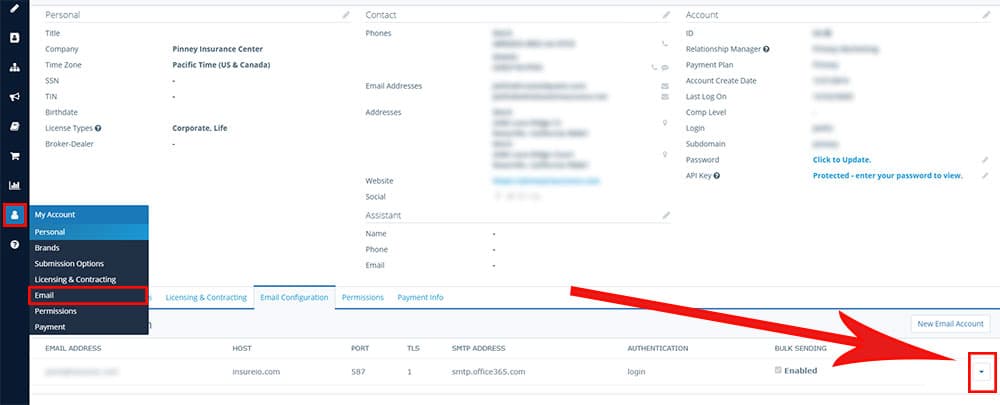
- In the Edit Email Account dialog box, click Advanced Options. Scroll down and click the checkbox to enable bulk sending, as shown below. Click Test & Save.

Now you're ready to send!
Step 2: Create a New Report
- Click Reporting in your left-hand main menu. Click New Report.

- Fill in the Report Name box, as shown below. Remember what you call this report because you'll search for it by title later, in the marketing section. Keep in mind that you can re-use any saved report at any time, and Insureio will always pull the most current list of recipients who fit the criteria.
EXAMPLE: If you save a report that pulls all new leads from the past 7 days, the report will pull the most recent 7 days. If you first ran the report on January 7, it will give you leads received from January 1 - 7. If you save this report and run it again on January 14, it will give you leads received from January 7 - 14.
- Select an Access setting. “User” is only you (default), “global” is every Insureio user, and “user and descendants” is you and any users in your hierarchy.

Step 3: Build and Save Your Report
Overview
Every report consists of two parts: the criteria used to gather contacts, and the information you want to retrieve about those contacts.
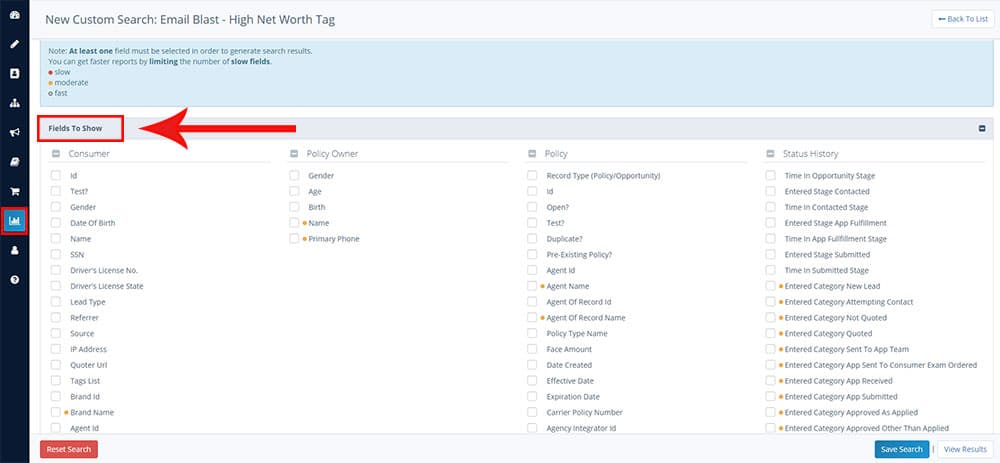
- Part 1: Gather contacts. Underneath the report name and access setting, you'll see groups of themed criteria you can use to gather contacts for this report: Lead Details / Marketing, Consumer Details, Case Details, Contact Owner, and Status (we'll go over this more below). Each of these groups will be open by default on the reporting screen. To toggle them open and closed, click the + box on the right, as shown below.

- To include a data point in your report, click to select it. If a further selection is required, choose from the available options. To start over, click the red Reset Search button at the bottom of your screen.

- Part 2: Retrieve information about contacts. Beneath the criteria for gathering contacts, you'll see additional criteria for the information you want to retrieve about these contacts. This includes consumer details (name, contact info, lead type, etc.), policy details, status history, and more. Click the type(s) of contact info you want the report to include. If a further selection is required, choose from the available options.

Here are a few specific tips and use cases you may find helpful in building your report.
Part 1: Who Do You Want to Include in Your Email Blast?
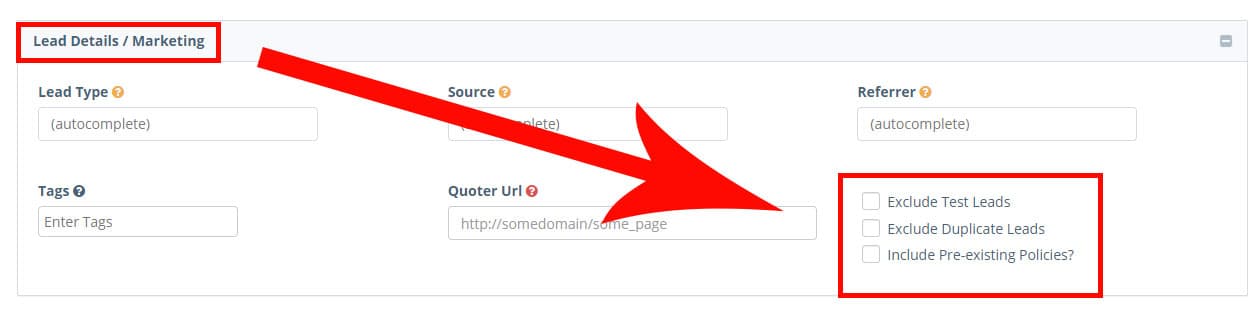
- First, look in the first section of criteria titled Lead Details / Marketing. Check the box to exclude test leads and duplicate leads; you may also want to exclude pre-existing policies, depending on the purpose of your email blast. Excluding test leads affects all leads marked with a status of "Withdrawn - Test." This is a global status available to all Insureio users. This will keep leads used in testing and training from affecting your reporting results.
- Scroll through the five report builder sections and select the details that best fit the group of recipients you want to email.
- TO EMAIL ALL YOUR AGENCY'S NEW LEADS: Scroll down to Status. Select a time interval from the Lead Received dropdown menu - last 7 days, for example.

- TO EMAIL ALL CASES ASSIGNED TO YOU WITH A CERTAIN BRAND PROFILE: Find the Contact Owner section. Select the appropriate profile from the Branding Profile dropdown menu and your name from the Agent dropdown menu.

- TO EMAIL ALL CONTACTS WITH A CERTAIN MARKETING TAG: In the Lead Details/Marketing section, find the Tags box and start typing the tag you want to select. Select the correct tag from the list Insureio provides. The system may take a few seconds to generate the list of matching tags. Don't worry - your browser hasn't frozen.

- TO EMAIL ALL YOUR AGENCY'S NEW LEADS: Scroll down to Status. Select a time interval from the Lead Received dropdown menu - last 7 days, for example.
Part 2: What Info Do You Need about Them?
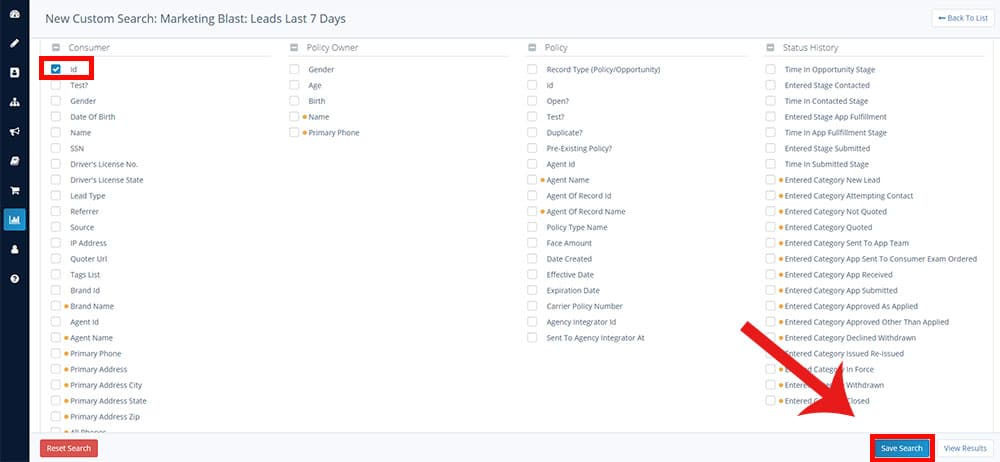
- Scroll down to Fields to Show.
- Select the data about each contact you want the report to include.
- PRO TIP: If all you're doing is sending an email blast, just select "ID" from the Consumer column, visible on the left. As long as that consumer has an email address saved in their record, Insureio will send your email to them, even if you don't select "All Emails" to include in your report. Nifty!
- Scroll to the bottom of the reporting options and click Save Search. You'll be able to review and edit your search before sending the email blast.
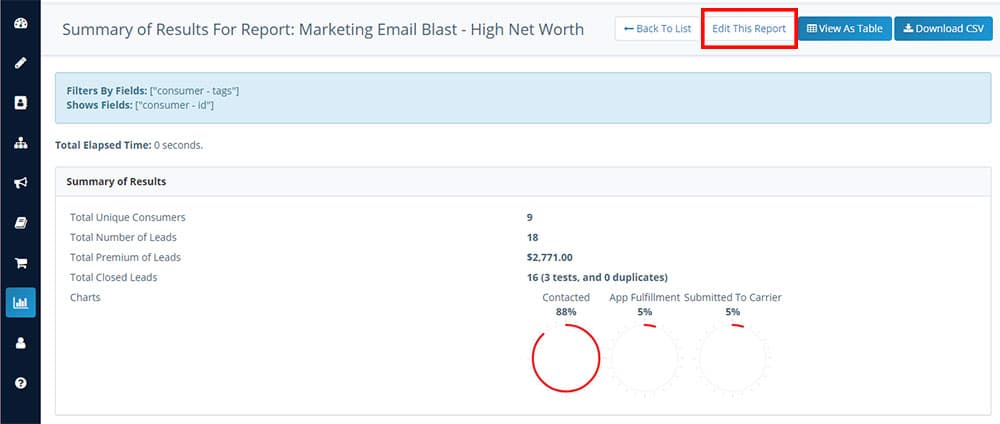
- After saving, you'll be taken to your list of reports. Click the title of your report to preview it and see how many contacts it contains. If everything looks correct, skip to Step 4 below. If you don't see the expected results, use the Edit This Report button to make changes to your criteria. Don't forget to click Save Search at the bottom of the screen once you've made your changes.
Step 4: Send Your Email Blast
- Click Marketing and then Marketing Templates in your left-hand main menu.
- Find the template you want to send. You can search by template name, purpose, planning need, or product category using the filters on the right, or use the pagination buttons at the bottom of the list to browse.
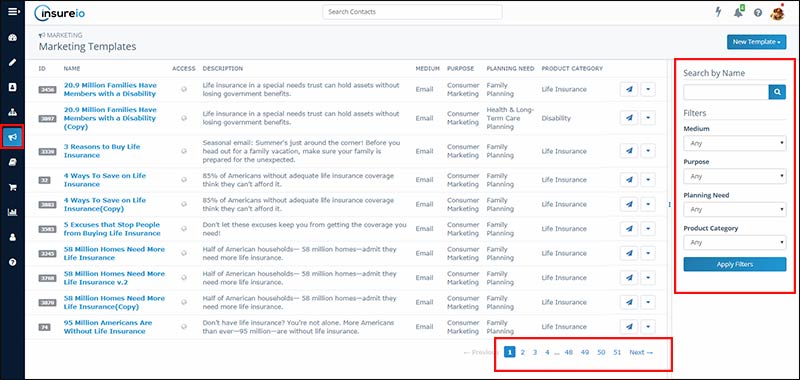
- PRO TIP: Planning Need will sort by need types, including family planning, financed arrangements, business & executive planning, etc. Product Category will sort by insurance type, including life insurance, annuities, long-term care, etc.
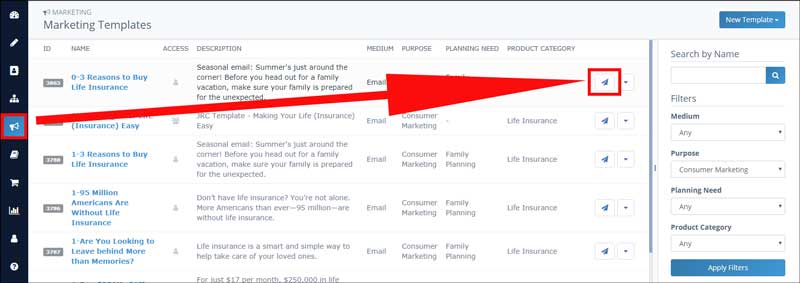
- Found a template? Click the paper airplane icon on the right.
- In the Sending Options box, select your link type. Do you want hyperlinks in this email to direct recipients to Insurance Division, your Insureio link, or a custom URL (your landing page, for example)? Click here for more information about the Insureio marketing link.
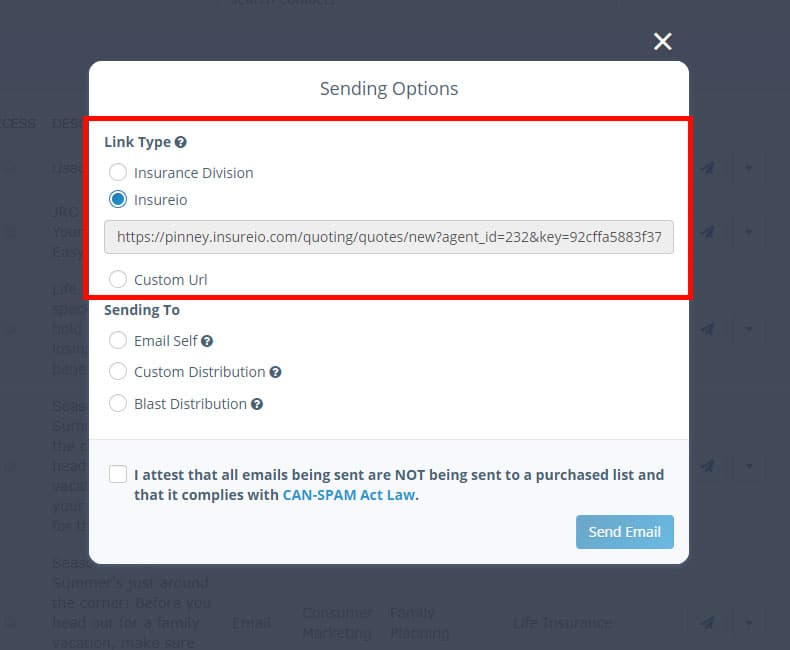
- For Sending To, select Blast Distribution. A box to select your template will appear. Start typing the name of your saved report in this box. Insureio will display a list of matching results. Select the desired report.
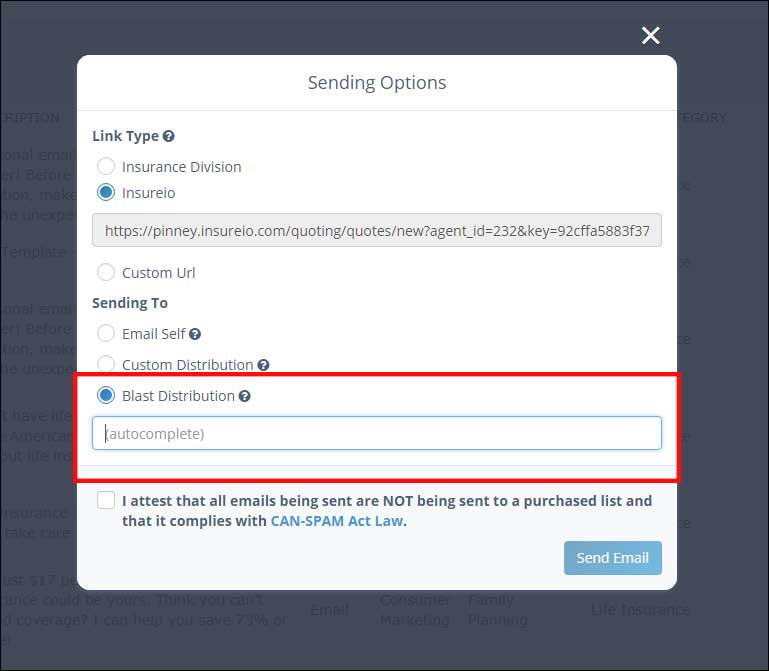
- Check the box next to the CAN-SPAM statement, attesting your emails are not being sent to a purchased list and otherwise comply with the CAN-SPAM Act.
- Click Send Email.
NOTE: Insureio will attempt to send an email to a recipient 4 times. After 4 failed delivery attempts, the system will stop sending to that email address. Your consumer will not receive the next email scheduled in a campaign.