LAST UPDATED: 2/4/21
CSV Import
You can import client data from your existing CRM, Outlook, or Excel into Insureio using a CSV file. First, download Insureio's demo CSV file to use as an example. The data your current CRM exports will need to be converted to the format used in the demo CSV in order to import correctly.
This tutorial will show you how to export data from your current CRM or email client, reformat it, and upload it to Insureio. It's best to do a trial run first, using 3-5 clients. If everything imports as expected, you can repeat the process with a larger list. If you need help, contact our support team at 877-935-6755.
Need a customized upload with more data than our sample CSV files contain? The Insureio Team can parse, convert, and upload your data for you for a fee. Contact our support team at 877-935-6755 for pricing.
Jump to a section:
Download the Appropriate Sample CSV
Export Your Current Data
Prepare Your CSV for Upload
Upload Your Sample CSV
Final Steps
Reference: Insureio's CSV Data Import Fields - Contacts Only
Reference: Insureio's CSV Data Import Fields - Contacts & Policies
Download the Appropriate Sample CSV File
1. Hover your mouse over Contacts Management in your left-hand main menu and click Import consumers Via CSV from your menu options.

2. Download the appropriate sample. Click the first link if you're uploading contacts only. Click the second link if you want to upload contacts and their policy data.

3. Your browser will download an Excel spreadsheet. If you chose a contacts-only upload, it will be called Contact_Record_Only_Sample.csv. If you chose to upload contacts and policies, it will be called Contact_Record_with_Policies_Sample.csv.

4. Open the file in Excel.
Export Your Current Data
1. Select a few clients (3-5) whose data you will export as a sample. Doing a test with 3-5 clients will familiarize you with the column headings (or “fields”) your CRM or email client exports. NOTE: You need at least 3 contacts in a CSV file for the upload to work.
2. Export the data into a .csv file. Your application’s Help function will tell you how to do this. Your application may refer to “.csv,” “comma separated value,” or “comma delineated.” These will all work. A few common applications are listed below.
a. In Outlook: File / Options / Advanced / Export. Click here for Microsoft Office's tutorial for Outlook 2016, Outlook 2013, Office for business, Office 365, and more.
b. In Excel: File / Save As / CSV. Click here for Microsoft Office's tutorial for Excel 2016, Excel 2013, Excel 2010, and Excel 2007.
c. In LinkedIn: Connections / Settings / Export. Click here for LinkedIn's tutorial.
d. In MailChimp: Lists / Manage Subscribers / Export List. Click here for MailChimp's tutorial.
TIP: If your application only allows you to export to Excel, do so – and simply open that file in Excel and “Save As” to turn a standard Excel file into a .csv.
3. Save the file somewhere you'll be able to find it again, such as your desktop.
Prepare Your CSV for Upload
1. Open your client data .csv file, saved in the previous step.
2. Compare your data’s column headings to the column headings in the Insureio sample .csv you downloaded in step 1. Delete any columns in your spreadsheet that don't have a corresponding column in the Insureio Sample CSV. In the example below, you'd delete columns like "Title," "Suffix," and "Company" from the My Exported Data spreadsheet since they do not have a corresponding column in the Insureio Sample CSV. (If you really need that information, you can always ask us to do a custom upload for you to preserve all that data.)

3. Rename columns in your .csv as needed so the headings correspond with the headings in the Insureio sample .csv. Not sure what some of our column headings mean? Click here to jump down the page, where we explain each of them.
TIP: Copy the Insureio headings and paste them into your exported document instead of retyping them. For the data to import correctly, the heading must match exactly, from the spelling to the capitalization.
a. Correct import: “gender” --> “gender”
b. Incorrect import: “Gender” --> “gender”
4. Format the data in your client data .csv so that it matches the formatting used in the Insureio sample .csv. In most cases, you'll need to transfer first, middle, and last names into one column, as well as enter a numeric code to indicate the client's state of residence. Some policy information, such as the carrier name, will also need to be entered as a numeric code rather than a name. Do not skip this step or your data will not import correctly. We included samples and links to the codes at the bottom of this page - click here for contact-only import or click here for policy data plus contacts.
PRO TIP: Sorting your spreadsheet by the state, carrier, health class, or other field will make converting to the appropriate codes faster and easier.
5. OPTIONAL: Are you planning on marketing to these clients via email? If so, you'll need to add two columns to your spreadsheet as described in this step. We hope to eliminate this step for you in the future, but our developers are still working on it. In the meantime, here's how to make sure you can gather all your contacts into a report necessary for bulk email marketing:
1. Navigate to the first empty column in your spreadsheet.
2. Type or paste this label into that column's header: case1.status_type_id
3. Enter a value of 629 beneath this header in every row that contains contact data.
4. Navigate to the first empty column in your spreadsheet.
5. Type or paste this label into that column's header: case1.quoting_details1.product_type_id
6. Enter a value of 1 beneath this header in every row that contains contact data.
6. OPTIONAL: There are other columns you can add manually if you would find additional data useful. This includes note(s), a source, tag(s), and assigning separate agent designations for a case and agent of record. Here's how to add each of them:
Notes
1. Navigate to the first empty column in your spreadsheet.
2. Type or paste this label into that column's header: note1.text
3. Enter any text you like, and it will import into that client's record as a note.
TIP: Want to enter more than one note? Add a column and change the number in the column header: note2.text, note3.text, etc.
Source
1. Navigate to the first empty column in your spreadsheet.
2. Type or paste this label into that column's header: source
3. You may enter any text or numbers you like, and it will import into that client's record as the source.
IMPORTANT: Be sure to add quotation marks around the text you want to import. For example, if you want to import a source as my network, this is what your cell should contain: "my network". You will then be able to run reports on all contacts/clients acquired from a particular source. A source might be a campaign, a website, an in-person venue or meeting where you met this client, etc.
Tags
1. Navigate to the first empty column in your spreadsheet.
2. Type or paste this label into that column's header: tag1
3. Enter a single-word or multi-word tag. You will then be able to run reports on all contacts/clients who have a particular tag. Insurieo's tags are case-insensitive, so if you enter a tag that contains a capital letter, it will display in the system in lower-case letters.
NOTE: You may want to use a descriptive prefix and a dash when entering a tag to make future reporting easier. For example, instead of typing "diabetes" as a tag, type "health-diabetic." That way, if you ever forget that you used "diabetes" instead of "diabetic," you could search for all your "health" tags and see what other wording you may have used. Here are a few more examples: health-smoker, lifestyle-scuba, and avocation-race car driver.
TIP: Want to enter more than one tag? Add another column and change the number in the column header: tag2, tag3, etc.
7. Save your file in a location you can remember and access easily, such as your desktop.
Upload Your Sample CSV
1. Return to the Contacts Management section of your left-hand main menu and select Import Consumers Via CSV.
2. Scroll down to the bottom of the page. Click Choose File to select the sample .csv file you prepared. Click Upload.

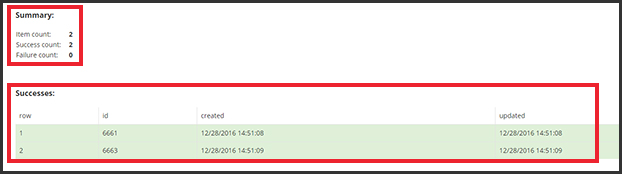
3. Sit tight while Insureio uploads your data. When the import is complete, you'll see a message telling you how many contacts imported successfully.
4. Hover over the Contacts Management icon in your left-hand menu and select Advanced Consumer Search. Use the search function to find one of your uploaded contacts, and browse their record to make sure the information you just uploaded appeared.

a. If you followed our suggestion to do a small trial run first, remember to keep track of the name(s) you just imported. You don't want to import them twice if you follow this trial run with an upload that contains the rest of your data. Duplicate contact records in Insureio cannot be deleted - you should only resubmit new data or data that failed to import.
Final Steps
Now that your test run was successful, it's time to import the rest of your contacts.
1. Export your remaining client data. Repeat the steps to export your client data, but this time, export all your data, not just a few sample records.
2. Prepare your CSV. Repeat the steps to prepare your CSV - be sure you have deleted any client records already successfully uploaded.
3. Upload your CSV. Repeat the steps to upload your CSV.
For Reference: Insureio's CSV Import Data Fields
Contact Record Only
agent_id - click here for instructions on finding your agent ID.
NOTE: This data field assigns a relationship manager to the consumer record. You can assign different agents to both the case and its associated tasks and/or as the agent of record for that case, as described below. Without a specified agent assignment in this field, lead distribution logic will be applied.
brand_id - click here for instructions on finding your brand ID (formerly called profile_id). NOTE: We're in the process of updating our database fields and CSV sample. Until further notice, if you see profile_id in your CSV sample, please change it to brand_id.
full_name – include first and last name in the same column (in that order)
gender - "Male" or "Female"
birth – client's birth date, formatted like this: MM/DD/YYYY
ssn – client’s social security number; format with dashes in your .csv if you want those dashes displayed in Insureio
dln - client’s driver’s license number
dln_state_id - numeric code for the state issuing the driver's license - click here for codes
marital_status – integer indicating the client’s marital status:
- 1 = single
- 2 = married
- 3 = divorced
- 4 = widowed
address1.street - client's street address, including apartment or suite number
address1.city - city
address1.state_id - numeric code - click here for codes
address1.zip - client's zip code
phone1.phone_type_id - integer indicating type of phone number:
- 1 = home
- 2 = work
- 3 = mobile
- 4 = fax
phone1.value - client’s phone number; format with dashes in your .csv if you want those dashes displayed in Insureio
phone1.ext - client's phone number extension, digits only
email1.value - client's email address
Contact Records with Policies
All the fields listed above PLUS additional columns for:
case1.quoting_details1.carrier_id - numeric code designating the carrier; click here for complete list
case1.policy_number - policy number; can be letters and/or numbers (i.e., B123456)
case1.effective_date - date formatted like this: MM/DD/YYYY
case1.quoting_details1.plan_name - policy plan name (i.e., Select-A-Term 20)
case1.quoting_details1.face_amount - the policy's face amount in dollar value; do not use a comma when inputting the amount (i.e., 50000)
case1.quoting_details1.category_id - numeric code designating the category (policy length); click here for complete list
case1.quoting_details1.carrier_health_class - the health class assigned to the client by the carrier (i.e., Standard NT)
case1.quoting_details1.premium_mode_id - integer describing the premium mode:
- 1 = annually
- 2 = semi-annually
- 3 = quarterly
- 4 = monthly
case1.quoting_details1.planned_modal_premium - the policy's planned modal premium in dollar value (i.e., 2789)
case1.sales_stage_id - integer describing the specific sales stage of this case:
- 1 = opportunity
- 2 = contacted
- 3 = app fulfillment
- 4 = submitted to carrier
- 5 = placed
case1.quoting_details1.sales_stage_id - integer describing the sales stage at the time the case was quoted, if the case is not placed; if case is placed, use a stage_id of 5:
- 1 = opportunity
- 2 = contacted
- 3 = app fulfillment
- 4 = submitted to carrier
- 5 = placed
case1.stakeholder_relationship1.genre_id - integer describing the policy's stakeholder:
- 1 = person
- 2 = trust
- 3 = company
case1.stakeholder_relationship1.relationship_type_id - integer describing the relationship type:
- 1 = parent
- 2 = sibling
- 3 = spouse/domestic partner
- 4 = other
- 5 = business
- 6 = child
- 7 = grandchild
- 8 = sibling
- 9 = stepparent
- 10 = stepchild
- 11 = trust
- 12 = creditors
- 13 = ex-spouse
case1.stakeholder_relationship1.full_name - first and last name if a person, trust name if a trust (i.e., My Insurance Trust)
case1.stakeholder_relationship1.gender - use "Male," "Female," or "Trust"
case1.stakeholder_relationship1.birth_or_trust_date - date formatted like this: MM/DD/YYYY
case1.stakeholder_relationship1.ssn - stakeholder’s social security number; format with dashes in your .csv if you want those dashes displayed in Insureio
case1.stakeholder_relationship1.trustee - trustee first and last name; leave blank if no trustee
case1.stakeholder_relationship1.is_beneficiary - use "true" to indicate a beneficiary; "false" to indicate a non-beneficiary
case1.stakeholder_relationship1.contingent - use "true" to indicate a contingent beneficiary; "false" to indicate a non-contingent beneficiary
case1.stakeholder_relationship1.percentage - number between 1 and 100
OPTIONAL: case1.agent_id - agent ID of the user who should be assigned to this case (assigned agent). If there is no specifically assigned agent for a case, it inherits the agent (relationship manager) from the consumer record.
OPTIONAL: case1.agent_of_record_id - agent ID of the user who should be assigned as the agent of record for this case. If there is no specifically assigned agent of record for a case, it inherits the default agent of record for the assigned agent.