LAST UPDATED: 4/13/21
Viewing New Leads in the Dashboard
Insureio displays new leads in several categories on the dashboard. Use the filters up top to sort by brand, status, and more. For a full walk-through of how to navigate the dashboard and use the filters, click here.
Jump to a section:
Basic Navigation
Get More Information about an Opportunity
Dropdown Menu Options for Common Actions
Sort Opportunities with Filters
Basic Navigation
As soon as you log into the system, you'll be taken straight to the Opportunity category on your dashboard. By default, the number beneath the category name is the number of client records with open tasks belonging to a status in that category. Most leads will be in statuses like Prospect, New Lead, or Attempting Contact, which are all contained in the Opportunity category.
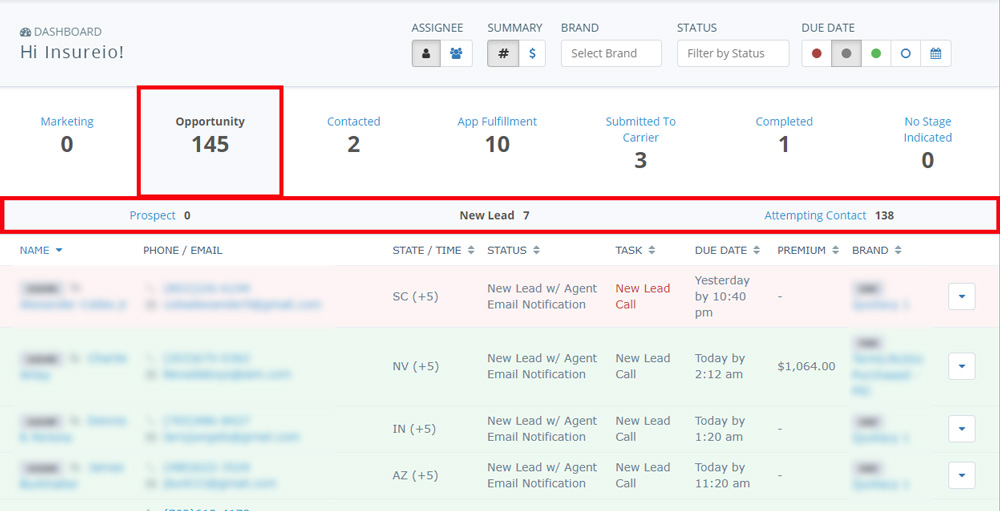
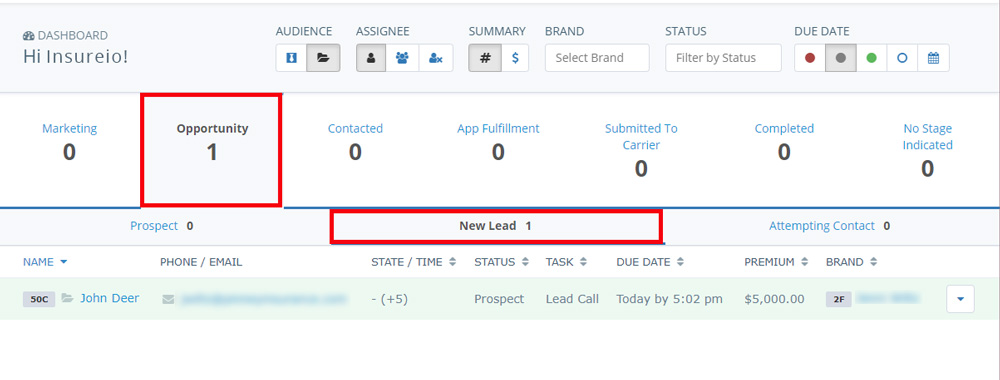
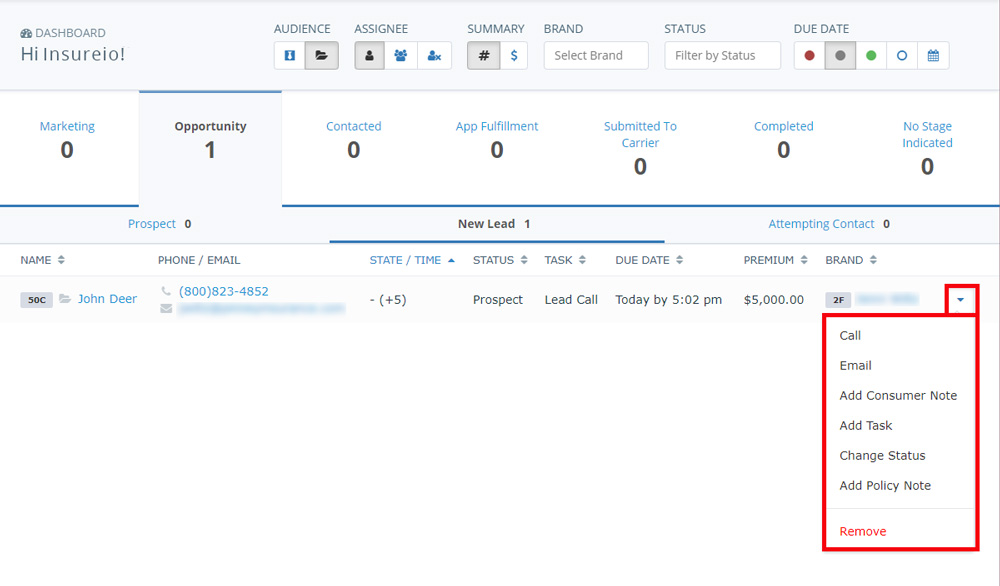
When you click on a status, you’ll see the complete list of leads within that status. At a glance, you can see the type of contact (consumer or agent/recruit), their phone and/or email, which state they're located in and the time difference from your time zone, the case status, the open task that needs completing and the associated due date, the premium associated with the case, and the brand profile to which that lead is assigned. In the image below, we have one new lead in the New Lead status within the Opportunity category:
Get More Information about an Opportunity
You have two ways to get more information about an opportunity or take action:
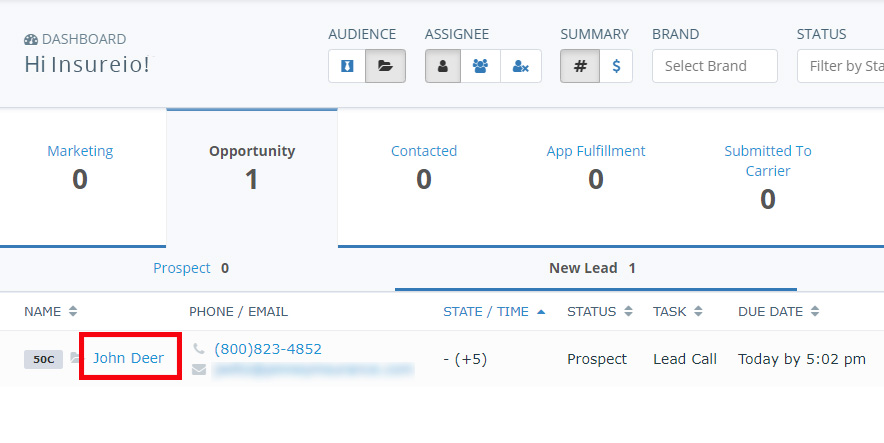
- Click the client name to be taken to the client record, where you can view policy details, contact information, and more.
- Click the dropdown menu on the right for easy access to common actions, like emailing this client or launching click-to-call. You can also add a note to the consumer profile or the police, add a task, and change the policy’s status.
Dropdown Menu Options for Common Actions
The right-hand dropdown menu contains the following options:
- Call. If you use click-to-call, select this option to dial the client instantly. If the client record contains more than one phone number, the primary phone will be dialed.
- Email. Select this option to launch your email client and pre-populate an email with the client's email address. If the client record contains more than one email address, the primary address will be selected.
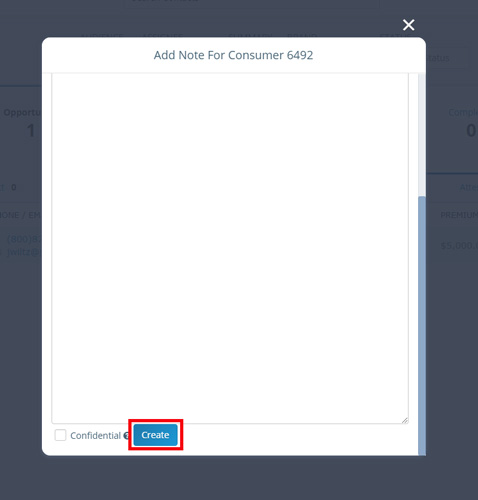
- Add Consumer Note. Select this option to add a note to the consumer’s record (as opposed to the policy – see below). At the bottom of the note entry field, you have the option to make this note confidential (only viewable to you). Click Create to save your note. To cancel without creating a note, click the white "x" at the top right of the modal window.
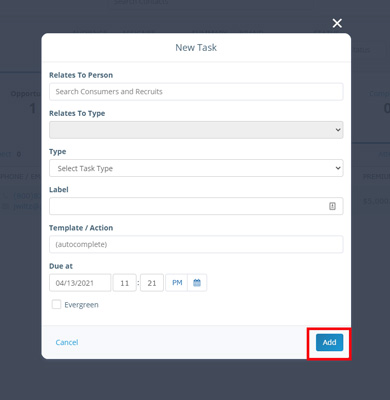
- Add Task. Select this option to create a new task for this client. A pop-up window will display the task options. Once you've filled in your task data, click the blue Add button at the bottom. To cancel without creating a task, click Cancel or the white "x" at the top right of the modal window.
- Relates to Person: Start typing the name of the consumer. Insureio will pull up a list of matches – select the correct one.
- Type: Select a task type: to-do, agent script, email consumer, SMS consumer, email agent, or letter.
- Label (optional): If you want to label your tasks, feel free to do so here.
- Template / Action: If your task is an agent script, email, or SMS message, start typing the name of the template you wish to use. Insureio will pull up a list of matches; choose the one you want.
- Due: Fill in a time for the task due date or click the calendar icon to select a date.
- Evergreen: Do you want this task to remain on your dashboard until it's manually removed? If so, check this box. (This option is more relevant for status-driven tasks, which may need to be removed when the consumer’s status changes.)
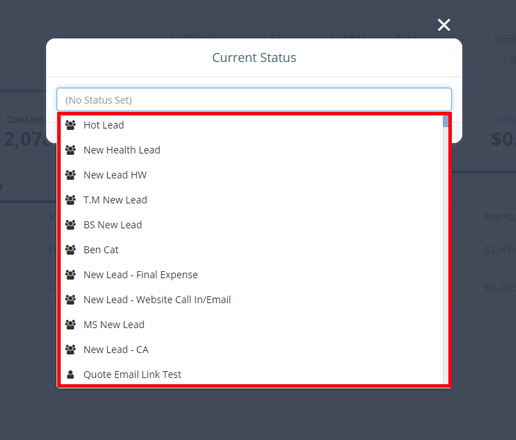
- Change Status. Select this option to make a quick change to the client's status. A pop-up window will display with a text box – click it to reveal a dropdown menu of all your available statuses (you may need to scroll down if you have quite a few). Click the new status to apply it, and you'll see the dashboard update instantly. To cancel without changing the status, click the white "x" at the top right of the modal window.
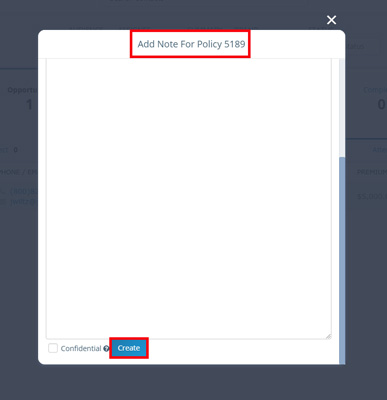
- Add Policy Note. Select this option to add a note to the policy (as opposed to the consumer record, as mentioned above). At the bottom of the note entry field, you have the option to make this note confidential (only viewable to you). Click Create to save your note. To cancel without creating a note, click the white "x" at the top right of the modal window.
Sort Opportunities with Filters
Use the filters at the top of the screen to control what you see on the dashboard. Once you apply a filter, that category will ONLY display information that fits the criteria. If you think you’re not seeing everything you should, be sure there are no additional filters applied.
Audience
Click to toggle between User/Recruit and Consumer.
NOTE: You will only see this filter if your subscription includes Agency Management.

Assignee
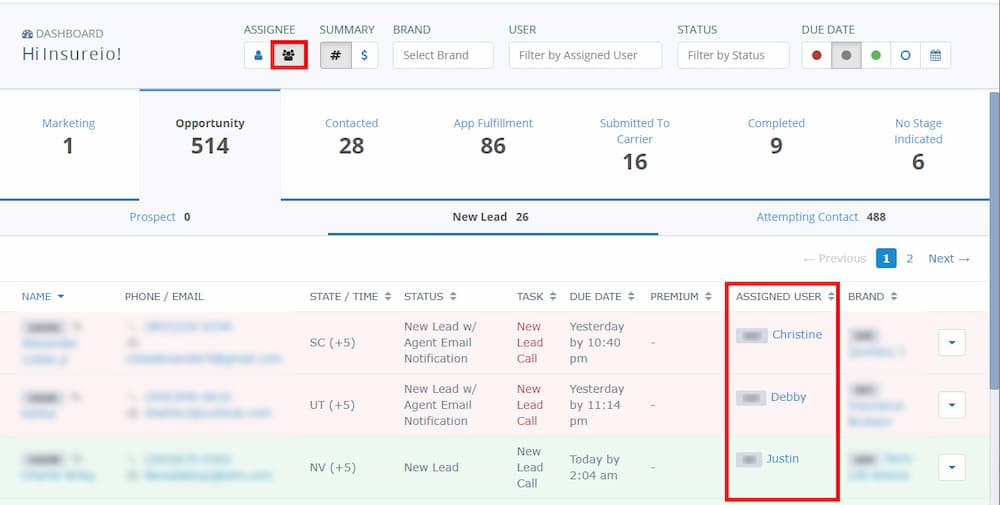
Click to toggle between Me and My Team. The default setting is Me. If you toggle to My Team, you’ll now see different assigned users in the contact data below, as in the image below.
PRO TIP: Depending on your account status and permissions, you may also see a third toggle option, Unassigned. Unassigned tasks are always status-driven tasks that have no assignee. This filter helps you stay on top of tasks that might otherwise slip through the cracks. The task may need to be performed by you, or if you manage a team, assigned to an available agent. You may want to open up your policy status rules and review their associated tasks. If you don't want to assign a task to a particular user every time, you can use the Assignment Role feature to assign it to the agent associated with a lead, for example. No task created within the client record will ever be unassigned because the system won’t let you save it without assigning it. For a full explanation of how Insureio's statuses and tasks work, click here.
Summary
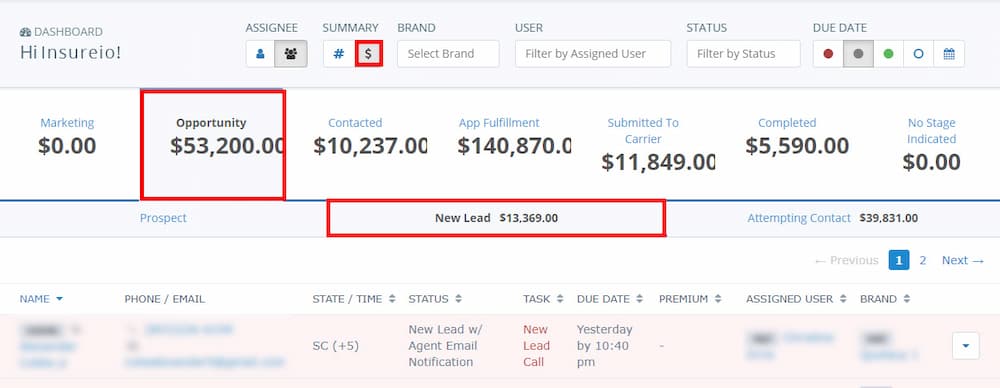
Click to toggle the counts that appear with each category and status. # displays the count of person/policy records with open tasks (all tasks, not just to-do tasks) and $ displays premium totals for policies with open tasks. The default setting is to display the number of records with open tasks. The image below shows the $ toggle display.
Brand, User, or Status
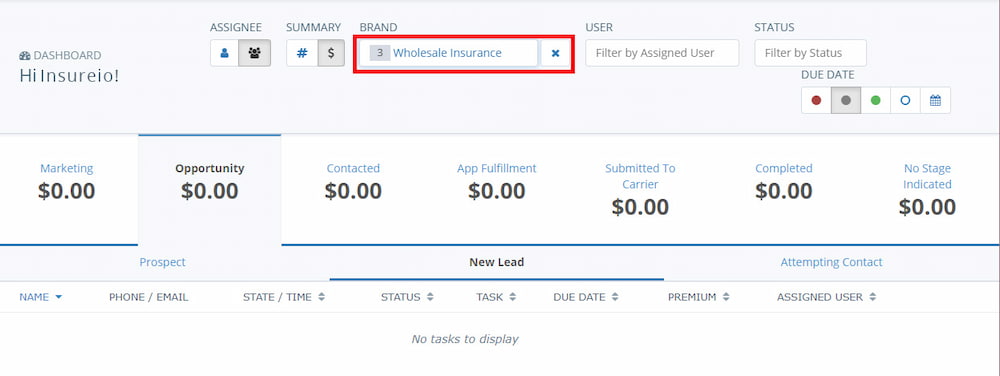
Select a particular brand, user, or status to view. Click the entry box and start typing. Insureio will pull up a list of matches; select the entry you want. To remove this filter, click the X to the right of the entry box.
Due Date
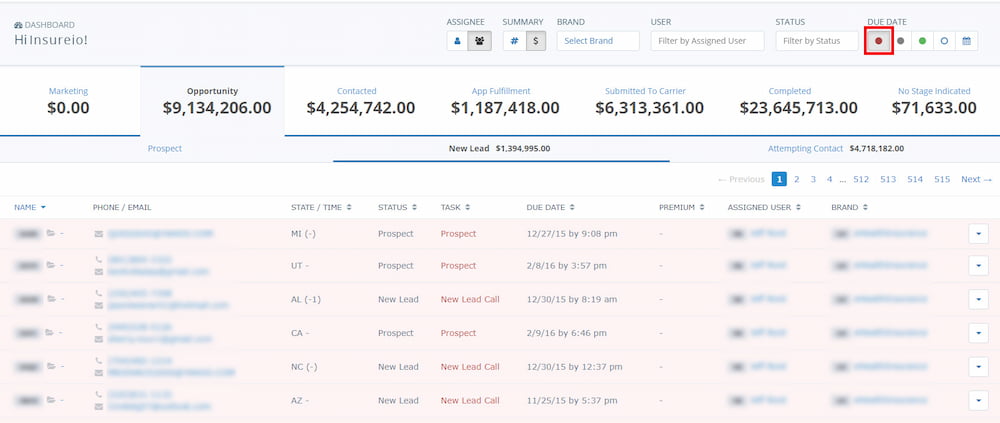
Select to filter tasks by past due (red), due today (gray), due in the next 7 days (green), all (blank), or select a custom range (calendar icon). The default setting is due today. Past due tasks are shaded in red. Tasks due in the next 7 days are shaded in green.
Tasks will be automatically sorted oldest to newest. If you’ve used the system for quite a while, you may want to use a custom range to keep the date range manageable. This task list includes manually entered tasks, as well as tasks automatically generated by a status change.
